Time-Lapse Movies 3: New Expressive Possibilities
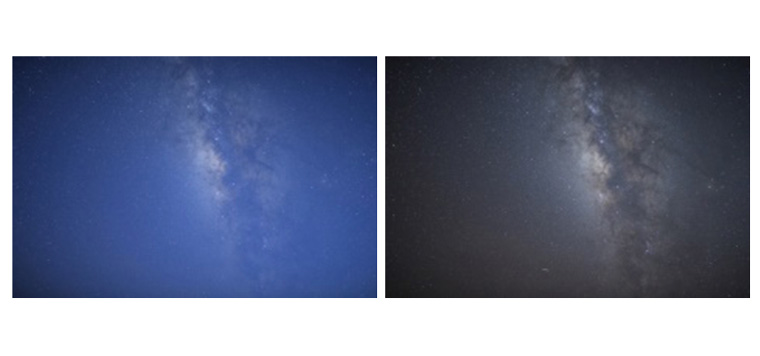
My aim was to capture the dynamic changes in the sky from the blue of dusk through the gathering darkness until the Milky Way appears. Given the large changes in subject brightness, I selected aperture-priority auto and hoped that combining interval-timer photography with silent photography and exposure smoothing would extend the lower limit of the exposure metering system enough to capture even dim stars. Another key strategy was to enable auto ISO sensitivity control with maximum sensitivity and minimum shutter speed set to values that similarly allow the camera to capture dim stars. Here I chose a maximum sensitivity of ISO 25600 and a minimum shutter speed of 5 seconds.
Filmed and narrated by YAMANO Yasuteru
The New Expressive Possibilities of Time-Lapse
Movies
To date the expressive capacity of time-lapse movies
has grown as a result of advances not only in photographic equipment but also in the
techniques used for interval timer photography and post-production image processing.
Even so, some subjects are still a challenge. This is particularly true of subjects
that change drastically in brightness or color after shooting starts, as one cannot
confidently choose the appropriate settings in advance.
I have taken up
the challenge of filming one such difficult subject to create a time lapse of the
sky from dusk to star-filled night.
Filming
from Dusk to Starry Night
I tried using the D850’s
features to the full to film a gradually darkening sky, starting after sunset and
continuing until all the stars were out.
Equipment
The most important decision I had to make in accomplishing my goal was choosing
a lens. To reliably capture dim stars toward the end of filming, to guarantee exposures
fast enough to be completed in the selected interval, and to hold maximum sensitivity
to a level that would produce images of acceptable quality, I needed a lens with a
wide maximum aperture.
An exposure time of around five seconds ensures
that the stars do not noticeably move during the exposure, while ISO sensitivity cannot
be raised too high when one considers the increase in noise associated with high sensitivities.
Inevitably this means one needs not only a fast lens but one that performs reliably
at maximum aperture, which if angle of view is also taken into account necessitates
choosing from lenses with a maximum aperture of f/1.4. In this case I picked a new
28mm f/1.4 lens praised for its performance.
Camera Settings
When it comes to configuring the camera for time-lapse movies, the challenge
is how to respond to changes in brightness and color that cannot be predicted at the
start of filming.
In this case, I chose an autoexposure mode to ensure
that the entire scene, from dusk till when the stars came out at night, could be shot
at the correct exposure; to further ensure that I could capture even dim stars once
the sky had darkened, I chose aperture-priority auto, which lets the photographer
shoot with aperture fixed at the widest setting. In aperture-priority auto, the shutter
speed is limited by interval between shots, so if we allow the system to respond by
also letting it adjust ISO sensitivity, it can deal with a wider range of brightnesses.
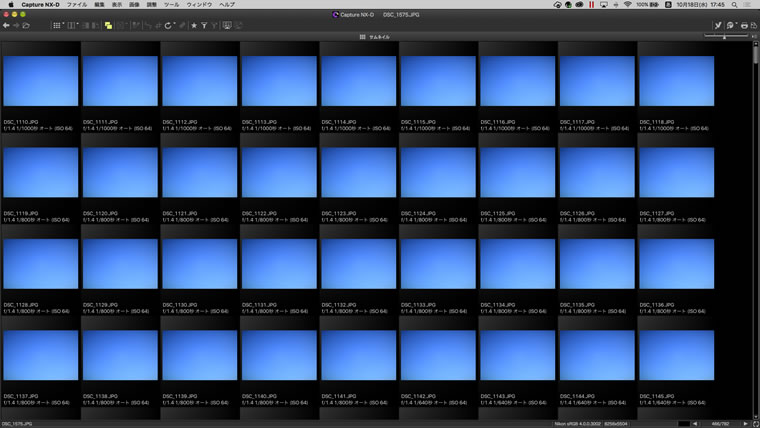
In this case I chose an ISO sensitivity of 64, enabled auto ISO sensitivity control,
and set the maximum sensitivity to ISO 25600. Although I would really prefer to limit
ISO sensitivity to around 6400, in this case I selected a maximum sensitivity of 25600
with the twin goals of testing the D850’s high sensitivity image quality and
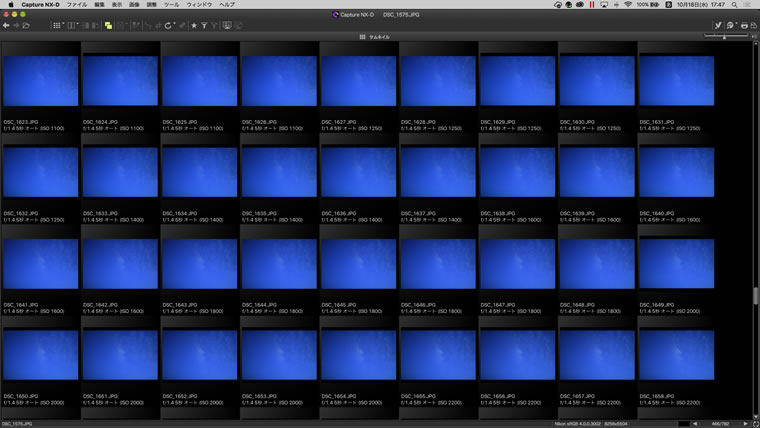
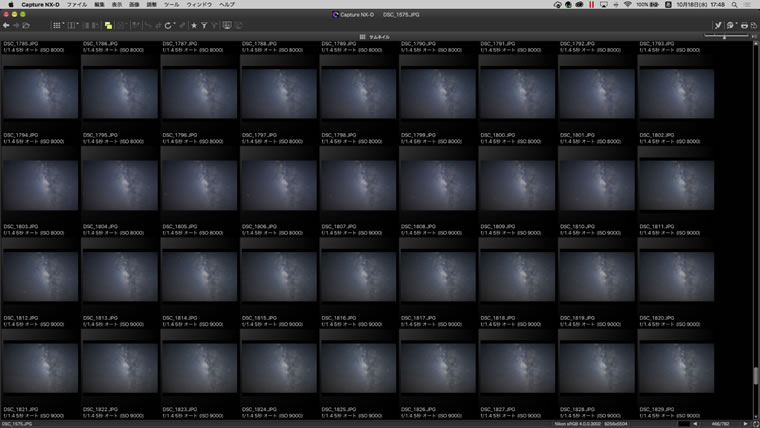
of determining how dim a star it could capture. With minimum shutter speed set to
five seconds, the camera will first increase the exposure time as the subject darkens
and then, when the shutter speed reaches five seconds, start increasing ISO sensitivity
from 64 until it reaches 25600, enabling the camera to capture dark subjects.
Figure 1: ISO sensitivity remains at ISO 64; optimal exposure is achieved by varying
the shutter speed.
Figure 2: Shutter speed remains at the maximum value
of five seconds; optimal exposure is achieved by raising ISO sensitivity.
Figure 3: With the minimum shutter speed at 5 seconds, auto ISO sensitivity control
has kicked in to raise sensitivity to 9000, reliably capturing the night sky.
Finding
the Ideal Settings for a Audience-Pleasing Movie
One enjoyable
yet challenging facet of making a time-lapse movie is finding the settings that make
the various changes in the subject maximally entertaining and beautiful to watch.
When filming the night sky, for example, choosing too long an interval between
the individual shots results a time-lapse movie in which the stars flash by at speeds
that are unsettling rather than relaxing. Or take color: the colors that look appealing
in the sky at dusk are different from those appropriate to the night sky, and there
is no settled answer to the question of how to achieve an attractive result. Although
the interval can be chosen with confidence before filming begins based on one’s
experience of how much time can be sped up while still producing pleasing results,
there is no way to predict how other elements, particularly color, will change once
filming has started, and the safest thing to do is to optimize the results after shooting
using NEF (RAW) processing or the like during the editing stage.
The trick
is first to shoot in NEF (RAW), the format that stands up best to editing, with an
eye to getting the correct exposure, then fine-tune the results in the NEF (RAW) processing
phase, and finally make the movie. In this case, colors were adjusted through repeated
trial and error by experimenting with auto white balance and different color temperatures
during the NEF (RAW) processing phase, as a result of which I settled on a color temperature
of 4170K as the setting at which the Milky Way looked the most impressive as it emerges
at the end of the film. At 4170K, the colors in the twilight scene are quite different
from those in real life, but I decided to use that setting for the entire film after
seeing the dreamlike quality it lent the scene. I have to be grateful for the on-camera
batch NEF (RAW) processing feature that makes it so easy to experiment with trial-and-error
NEF (RAW) processing, formerly a burdensome task I would have been hesitant to undertake.
In
Conclusion
What I have presented here is an example of how frames
can be shot using the new features of the D850 to best advantage, how on-camera NEF
(RAW) processing can be used to good effect, and how the results can be made into
a movie using the Photoshop software familiar to so many. One can make many movies
from the same NEF (RAW) images by varying NEF (RAW) processing and editing settings
to produce different looks.
Some typical ways of changing the look of a
time-lapse movie are to speed up, slow down, or vary the motion of the subject; brighten,
darken, or vary exposure; or raise, lower, or vary color temperature. Varying settings,
particularly mid-way through the film, is a specialization at which the movie-editing
or time-lapse software employed during the NEF (RAW) processing or editing stages
excels. Those who want greater creative control in making time-lapse movies are encouraged
to look into software with these features.
We may have reached the end
of our time together, but I’d like to talk about filming one more time. Because
this tutorial was intended to present the simplest, most widely-used time-lapse movie
techniques, I have discussed only methods that use a single piece of equipment—a
tripod—but there exist a number of other devices for filming time-lapse movies,
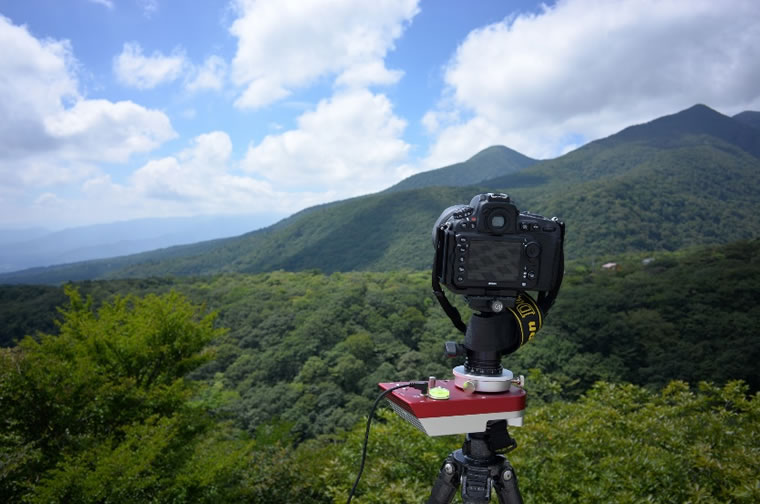
such as dollies that can move the camera during interval-timer photography or rotating
tripod heads that can spin the camera. Both devices must be moved very slowly so that
the final time-lapse movie will flow at a natural speed.
If the frame size is large enough that you have pixels to spare, motion can be added
during editing in the form of zooms, pans, or tilts, but to change the viewpoint you
have to move the camera during filming. Consequently you will need to decide during
the planning stages whether your goals can be met using effects added during editing
or if you will need to come up with some way to achieving the effect during filming.
This is naturally premised not only on what effects you can add during editing
given your computer, software, and skillset, or on what dollies, rotating tripod heads,
and other equipment you have to hand during filming, but also on whether you are able
to choose the appropriate settings before filming.
It is easy to get started
making enjoyable, high-quality time-lapse movies, but you will also find in them a
rich potential equal to the tremendous degree creative freedom they offer. I invite
you all to experience the world of time-lapse movie-making.
Tips and Tricks > Time-Lapse Movies 1: Things to Know About Time-Lapse Movies
Tips and Tricks > Time-Lapse
Movies 2: Settings Selection and Movie Creation
Profile of YAMANO Yasuteru
Photographer and researcher of photographic techniques. Born in 1954 in Kagawa. Has been publishing photos and articles in astronomical journals since the 1970s. Has published many digital photos and articles relating to digital astronomical photography since the year 2000. Member of the Society of Photography and Imaging of Japan (SPIJ).


