Silent Photography Ⅱ: Preventing Vibration in Landscape Shots
Narrated by YAMANO Yasuteru
A Variety of Features to Prevent Vibration
One reason to use silent photography is to prevent vibration. In addition
to silent mode, there are a number of other “vibration suppression” features
available to prevent vibration originating in the camera, including mirror-up
mode, exposure delay mode, and the electronic front-curtain
shutter. I’ll outline these features here; use them according to your
goals.
Mirror-up Mode
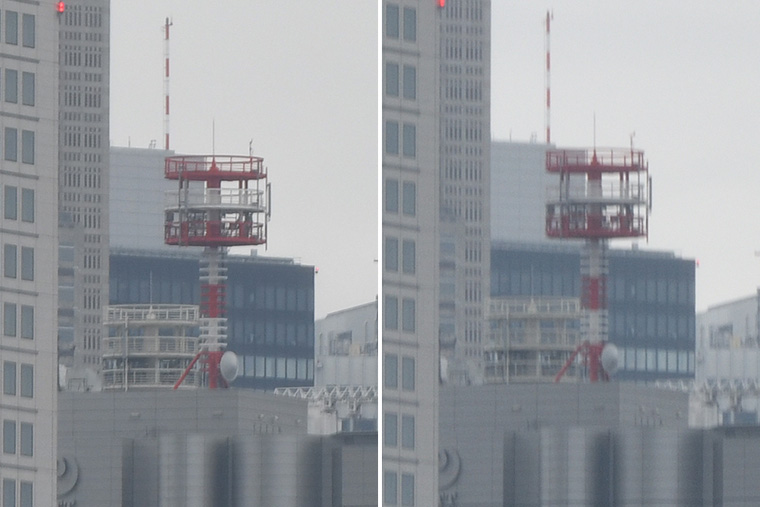
In mirror-up mode, the photographer presses the shutter-release button
once to raise the mirror and again to start the exposure. Delaying the start of the
exposure until after the vibrations from raising the mirror have died down prevents
blur caused by “mirror slap”.
Using a remote cord in place
of the camera shutter-release button not only smooths the action of pressing the shutter-release
button twice, but also helps keep you safe from camera blur caused by handling the
camera directly. Combining mirror-up mode with the electronic front-curtain shutter
is guaranteed to prevent camera blur, given that “shutter shock” caused
by the operation of the shutter can still cause camera blur even in mirror-up mode.
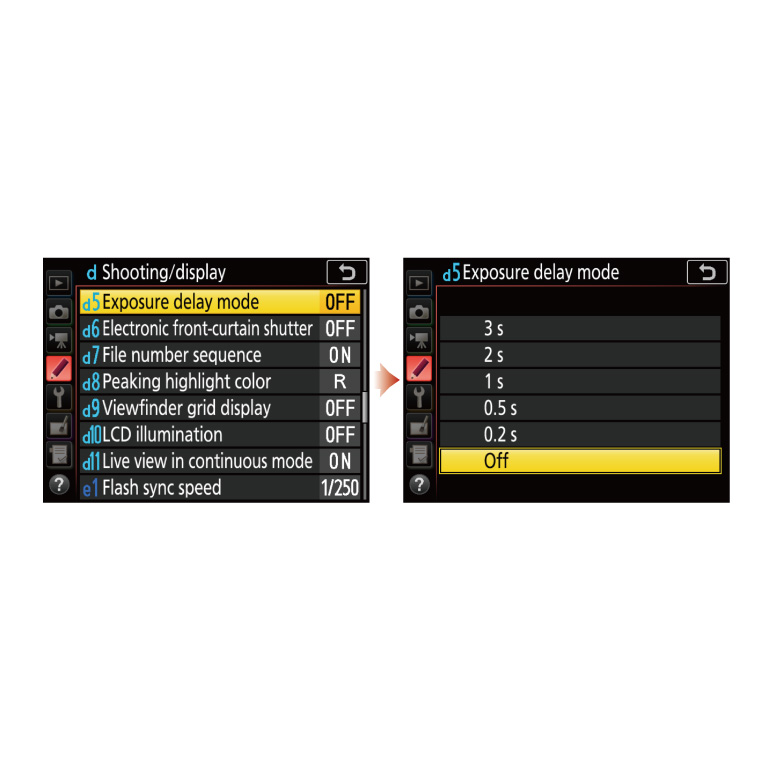
Exposure-Delay
Mode
Exposure-delay mode delays the start of each exposure
until a set time after the mirror has been raised. The delays that can be chosen according
to your expectation of how long it will take the vibration from the mirror to die
down are 0.2, 0.5, 1, 2, and 3 seconds. Exposure-delay mode can be thought of as an
automatic shutter release that takes place a set time after the mirror has been raised.
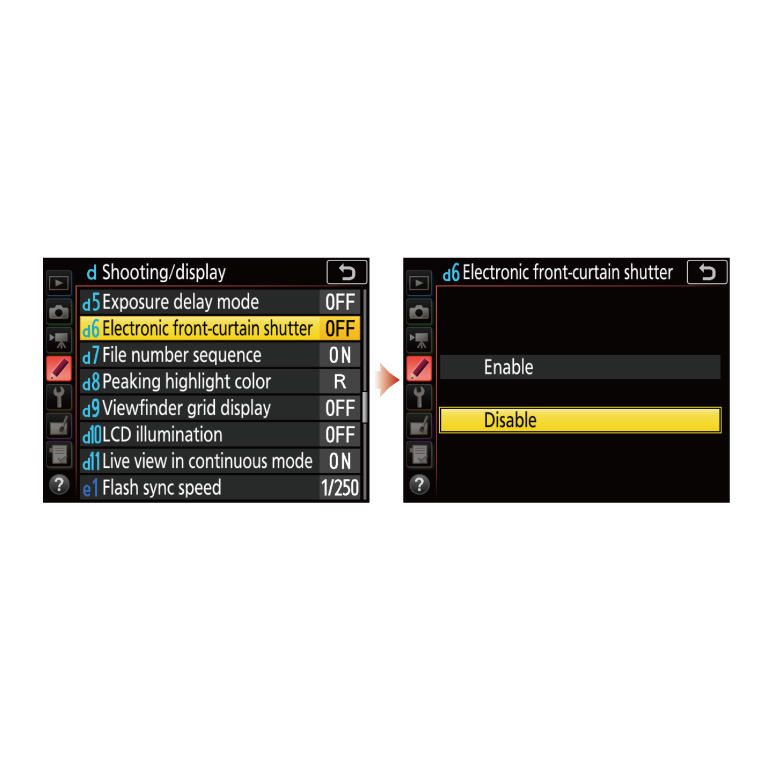
The Electronic
Front-Curtain Shutter
The electronic front-curtain shutter
starts the exposure without engaging the mechanical (front-curtain) shutter. Because
it requires that the mirror already be raised, blur caused by the mirror and shutter
is not a concern and any worries about blur during single-frame photography are effectively
eliminated. In burst live-view photography, however, there is the possibility of blur
due to vibrations from the mechanical (rear-curtain) shutter that have not have died
down before the next photo is taken, making silent live view photography a valid choice,
although one needs to be aware of the potential for a rolling shutter effect. It’s
probably best to decide which setting is optimal for your purposes based on the potential
for camera and subject movement.
Some Effective Uses
Synthesizing the information to this point necessitates some repetition,
but in single-frame photography, or in other words in situations in which burst photography
is not required, any anxiety you might experience with respect to blur due to vibration
originating in the camera can be eliminated by shooting with the electronic front-curtain
shutter after the mirror has been raised. Given that this option can appropriately
be used with the camera mounted on a tripod, you can make doubly sure by using a remote
cord or otherwise taking steps to avoid handling the camera directly. If you don’t
have access to a remote cord or other equipment for remote photography, the electronic
front-curtain shutter can be combined with exposure-delay mode, which also eliminates
concerns about the rolling shutter effect that can occur during silent photography.
If you’re not using a tripod but are instead taking hand-held
photographs with the camera at eye level, you will not be able to frame shots in the
viewfinder when using the electronic front-curtain shutter to prevent blur, as this
would require that the mirror be raised during shooting, but you can instead frame
shots in the monitor when the mirror is raised during live view. In this case a third-party
hood loupe is recommended, as it not only prevents leakage of light from the monitor
but also allows photos to be taken with camera at eye level, making the camera easier
to hold.
Other
“Silent Photography” Options
Silent photography
is also available during time-lapse movie recording and interval-timer and focus-shift
photography. Silent photography is recommended in these situations not only because
it mutes distracting sounds but also because it eliminates concerns regarding wear
caused by the operation of the mirror, shutter, and other camera mechanisms. Select
On for Silent photography in the interval-timer,
time-lapse, or focus-shift menu. Photos will be taken in Mode 1 even
if Mode 2 is currently selected for Silent live view photography.
Combining
Silent Photography with Other Features
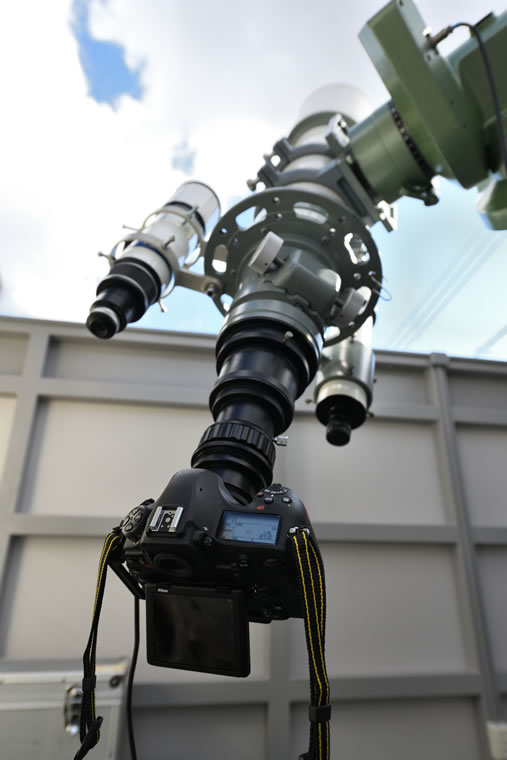
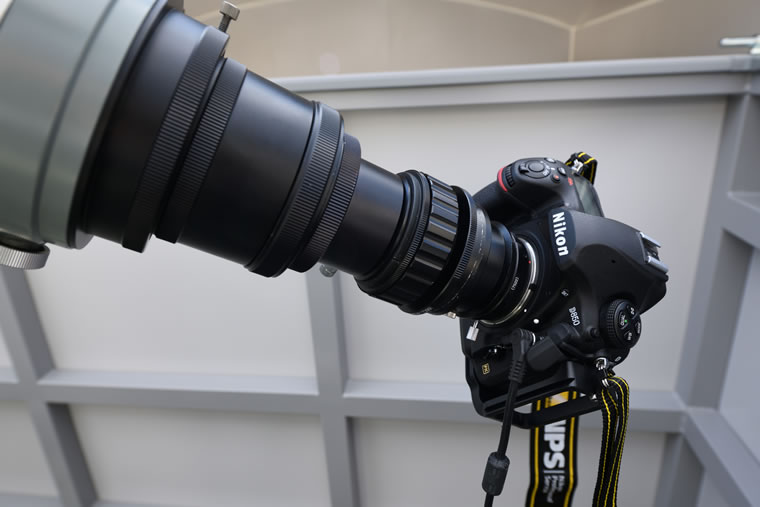
Although I personally use silent photography a lot in order to keep vibration to a minimum for astrophotography, particularly when the camera is attached to a telescope, I sometimes find it useful to combine it with other features, one of which I describe below.
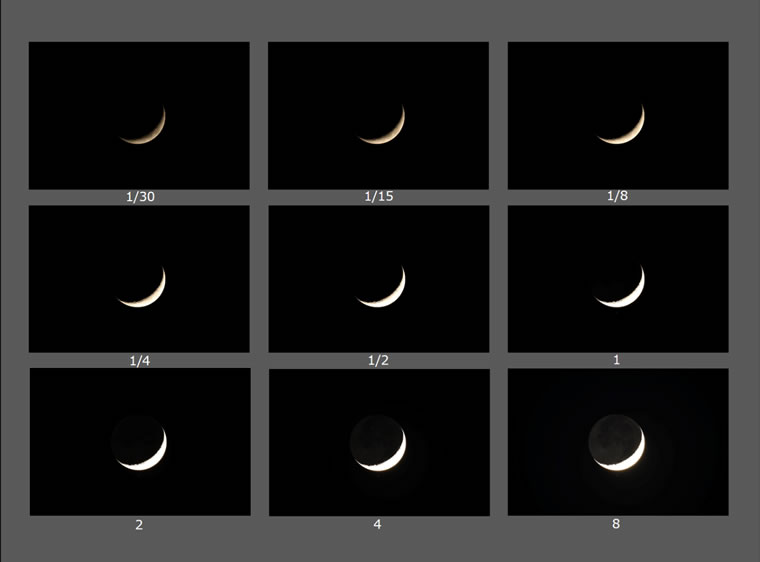
Sample image: A 9-frame exposure bracketing sequence of the crescent moon.
Astronomical telescope (Takahashi FCT‑150, aperture 150 mm, focal length 1050 mm);
Camera: D850; ISO sensitivity: ISO 64; Silent photography: On (Mode 1); Bracketing:
Exposure bracketing (9 frames); Exposure mode: Manual; Image quality: 14-bit NEF (RAW);
Picture Control: Neutral, chosen during NEF (RAW) processing; Exposure time in seconds
is shown under each frame
These are photos of a crescent moon. In this
phase, one can see not only the bright area of the moon but also the area in shadow,
faintly lit by earth-shine. Given the considerable difference in brightness between
the two areas, I chose to use exposure bracketing to help find the optimal exposure,
with the additional goal of creating suitable raw material for later tone compression.
Here is what I hoped to achieve:
(1) Goal: To complete 9 shots separated
by 1 EV in as short a time as possible. Means: Exposure bracketing.
(2) Goal: To prevent vibration when the camera is attached to a telescope.
Means: Silent photography.
(3) Goal: To record pictures in
NEF (RAW) format so that colors and tones can later be fine-tuned. Means: Mode
1
As a result, I was able to shoot with maximum efficiency
without worrying about camera vibration, allowing me to get good results with extreme
ease. The objective that brought about this state of affairs was to shoot an exposure
bracketing sequence in a short time without having to worry about camera vibration,
but it seems probable that one could have many similar motivations.
I want you all to use a variety of camera features, including silent photography,
for optimal settings that produce the best results given the type of subject and the
state of the camera system.
Tips and Tricks > Silent Photography Ⅰ, the Basics: Taking Photos Silently
Profile of YAMANO Yasuteru
Photographer and researcher of photographic techniques. Born in 1954 in Kagawa. Has been publishing photos and articles in astronomical journals since the 1970s. Has published many digital photos and articles relating to digital astronomical photography since the year 2000. Member of the Society of Photography and Imaging of Japan (SPIJ).
Violinist courtesy of KYO-GEI INTERNATIONAL LLC.
ZACUTO Z-Finder Pro courtesy of Nobby Tech. Ltd.
SLIK Light carbon E83 FA courtesy of Kenko Tokina Co., Ltd.


