Video Shooting
Video Shooting #5: N-RAW Videos (Tone Mode: N-Log)
Supervision and sample footage by Takuro Inoue (Videographer)
N-RAW video offers the highest level of flexibility in post-production. The rich information recorded in the N-RAW video gives you more freedom when color grading in post-production without losing sharpness in your images.
Additionally, N-RAW video is available with in-camera recording in up to 8K60p using the Z9 and Z8, offering you RAW footage with a minimal equipment setup. In this article, we are going to introduce things to consider about N-RAW data, camera settings, points to be aware of when shooting in N-RAW and setting up N-RAW footage for color grading.
Index:
- 1. Things to Consider about N-RAW Data
- 2. Camera Settings
- 3. Points to be Aware of When Shooting in N-RAW
- 4. Setting up N-RAW Footage for Color Grading
We'll get started with a few important things to consider before working with N-RAW.
While the file size of N-RAW is about half that of ProRes RAW HQ, it's still considerably heavier compared to other video file types, at about 1GB per 10 seconds for 4K30p. Therefore, it is recommended to use CFexpress memory cards with a writing speed of 1500MB/s or higher when shooting, and an SSD with fast data transfer speed as an external storage for saving data when editing.
Due to the size of N-RAW files, it's also worth considering whether it is better to shoot in different file types depending on the shot. For example, for videos with longer recording times, it is effective to prioritize N-RAW for only important shots or shots that require more precise color grading in post-production and shoot in smaller file types, such as H.265 10-bit, for the other shots.
Now let's go to camera settings.
Go to [Video file type] in the video recording menu and select [N-RAW 12-bit (NEV)]. Then, select [SDR] or [N-Log] for the tone mode.
For RAW shooting, because of its higher dynamic range, N-Log is recommended when you want more flexibility in post-production to fully color grade the footage.


If you are shooting in more than one file type including RAW video for a project, we recommend shooting all file types in N-Log tone mode to make matching the footage when color grading a smoother process.
You can also select SDR when you want to use the footage straight out of camera or want to edit the footage but minimize color grading in post-production.
Once you've set the tone mode, go to [Video quality (N-RAW)] in the video recording menu and select [High quality] or [Normal]. In this article, we will select [Normal]. Please note that while [High quality] improves the image quality, it also increases the file size. Therefore, select the quality based on your needs, for example, use [Normal] for regular shooting and [High quality] just for commercial films and TV ads.
Select [Frame size/frame rate] in the video recording menu. In this article, we will select 4.1K30p. Keep in mind that the file size increases with the resolution and frame rate, so it is best not to set them higher than necessary.
Next, set [View assist] to [ON] in the custom settings menu. When shooting in N-Log tone mode, a low-contrast image is displayed on the monitor, which can make it difficult to see if you're really getting the image you want. Setting [View Assist] to [ON] allows you to apply a natural look on the display to get a better idea of the final image as you shoot.
Lastly, we will set the ISO sensitivity. Go to [ISO sensitivity settings] in the video recording menu and set [Maximum sensitivity] to [2000]. Setting the upper limit of ISO sensitivity in advance will prevent the ISO from unintentionally increasing too high and reduce the risk of noisy footage.
*Regarding the standard ISO sensitivity for N-Log: The standard sensitivities for the Z9 and Z8 are ISO 800 and ISO 4000. The standard sensitivities for the Z6III, Z5II, and ZR are ISO 800 and ISO 6400. We recommend shooting at the standard sensitivity settings.
Next, we will introduce some points to be aware of when shooting in N-RAW.
N-RAW is a video file type that captures a lot of detail and information, giving you great flexibility for color grading in post-production. Since you have a lot of room to edit after importing the footage into your editing software, you don't need to worry about getting everything perfect only if you care about the exposure while shooting, unlike with other file types. However, please keep in mind that shooting in N-RAW means you do have some restrictions on the video features of the camera you can use compared to when shooting in other file types.
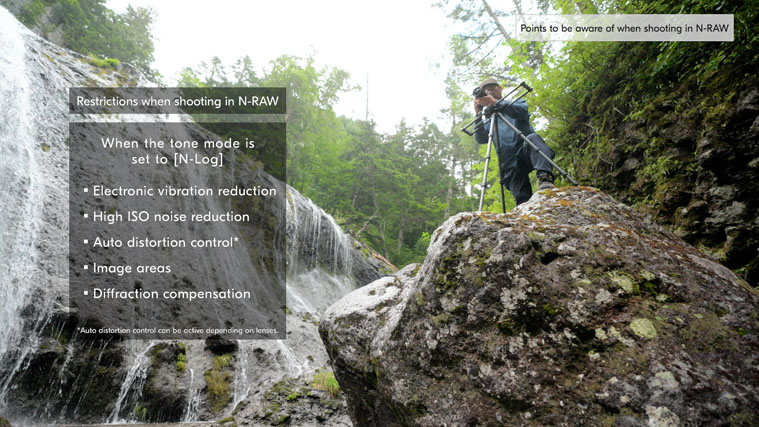
These restricted features include electronic vibration reduction, high ISO noise reduction, and auto distortion control.
For more details, please refer to the Z9 Professional Technical guide N-RAW edition![]() available from the Nikon download center. For useful information about exposure adjustments when shooting, please refer to "Shooting tips" of the Digitutor article "Video Shooting #4 - N-Log Videos (Video File Type: H.265 10-bit)".
available from the Nikon download center. For useful information about exposure adjustments when shooting, please refer to "Shooting tips" of the Digitutor article "Video Shooting #4 - N-Log Videos (Video File Type: H.265 10-bit)".
Lastly, we will introduce how to set up N-RAW footage for color grading. In this article, we will show you how to do this for DaVinci Resolve.
Create a new project. Go to [File] in the menu bar and open [Project Settings]. Open the [Master Settings] tab in the [Project Settings] window, set the frame resolution and frame rate in the [Timeline Format].

Open the [Color Management] tab and set [Color Space & Transforms]. Select [DaVinci YRGB Color Managed] in [Color science], and uncheck [Automatic color management]. Select [SDR Rec.709] in [Color processing mode]. Select [Rec.709-A] in [Output color space]. Click [Save] to close the window. Open the Media page and add the video files that you want to color grade to the media pool. Open the Edit page and add the video files to the timeline.
Now you are ready to color grade your footage on the Color page.
For your reference, it is convenient to use proxy files when editing RAW videos. Open the folder where the video files you want to edit are stored. In the same folder, create a new folder with the folder name Proxy. Move all the generated MP4 proxy files into the folder.
To start editing with the proxy files, open the folder in the software. The steps we introduced in this article are just for reference purposes. It's always good to find a process that best fits your own workflow.
Shooting in N-RAW maximizes the possibilities in post-production and gives you a professional-level quality for both passion projects and client work.