Video Shooting
Video Shooting #4: N-Log Videos (Video File Type: H.265 10-bit)
Supervision and sample footage by Takuro Inoue (Videographer)
N-Log expands video possibilities to take your creative expression further.
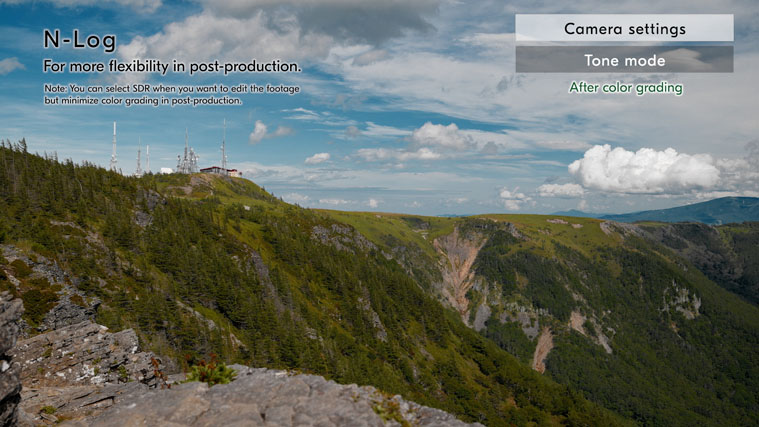
Get far less oversaturated footage and reduce the risk of blowing out the highlights and losing information in the shadows, even for daylight landscape scenes with extreme differences between the brightest and darkest parts of the frame. N-Log also gives you more room to color grade in post-production to create the exact look and mood that you want to achieve.
In this article, following a video production workflow using the video file type of H.265 10-bit in N-Log tone mode, we are going to introduce camera settings, shooting tips, and setting up N-Log footage for color grading.
Index:
We are going to start with the camera settings.
Go to [Video file type] in the video recording menu and select [H.265 10-bit (MOV)], which is a small size but still suitable for color grading.
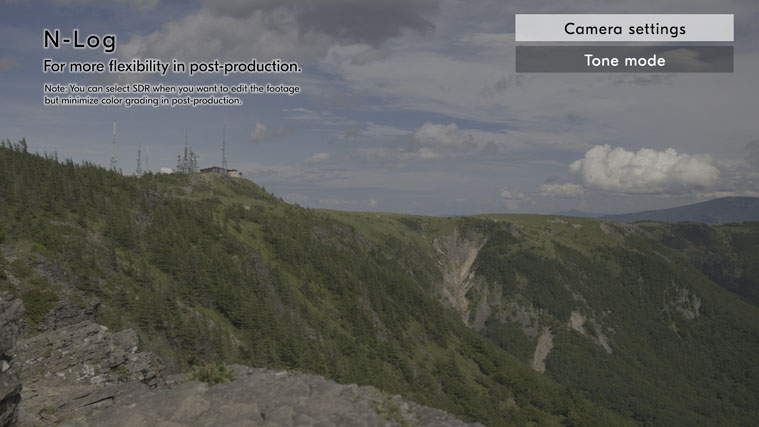
Select [N-Log] in the tone mode.
Because of its higher dynamic range, N-Log is recommended when you want more flexibility in post-production to fully color grade the footage.
*You can select SDR when you want to edit the footage but minimize color grading in post-production.
Next, set [View assist] to [ON] in the custom settings menu.
When shooting in N-Log, a low-contrast image is displayed on the monitor, which can make it difficult to see if you're really getting the image you want. Setting [View Assist] to [ON] allows you to apply a natural look on the display to get a better idea of the final image as you shoot.
*[View Assist] is applied to the display when shooting.
We will set the upper limit of ISO sensitivity. Go to [ISO sensitivity settings] in the video recording menu and set [Maximum sensitivity] to [2000]. Setting the upper limit in advance will prevent the ISO from unintentionally increasing too high and reduce noise in footage.
Here, we will introduce tips for when shooting in N-Log.
N-Log is great for capturing rich tonal details in video, but you still need to expose your footage correctly to minimize blown-out highlights and blocked-up shadows.
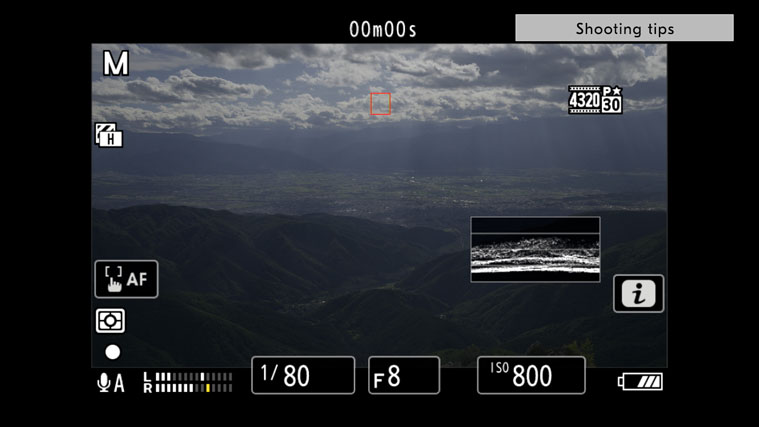
As N-Log retains much more information in the highlights than in shadows, it is recommended to raise your exposure a little more than you usually do. You can use the wave-form monitor (WFM) and the zebra pattern displays to help you keep a close eye on your exposure as you make adjustments.
If you want to display the wave-form on the monitor, go to g16 [Brightness Information Display] in the custom settings menu and select [Wave-form monitor]. Then, go to [g18 Custom Monitor Shooting Display] in the custom settings menu and check [Display 2]. When [Display 2] is selected, press right on the multi selector to check [Brightness information].
Now you can display the wave-form monitor by pressing the DISP button when you are shooting video.
While taking care not to blow out the highlights for the balanced exposure, carefully raise the exposure until the wave-form gets towards the highlight end.
If you want to make adjustments while monitoring the exposure with the zebra pattern display, go to [g13 Zebra pattern] and [Pattern Tone Range], and select [Highlights] to display diagonal lines on areas where the highlights are blown out.
When raising the exposure to be brighter, it is recommended to set [Highlight threshold] of the zebra pattern to the default value or higher.
*When [Highlights] is selected, the [Highlight threshold] is set to [250] by default. The value can be set between 120 and 255. When the value is lower, the zebra patterns will be displayed even where you are still very safe from overexposing the image
Next, we will introduce using ND filters.
As a good rule of thumb for video, you should set your shutter speed to be double that of your frame rate. It is recommended to use a variable ND filter, which allows you to smoothly adjust to a correct exposure without changing the aperture or shutter speed.
Unless you are shooting in RAW video file type, you don't have the option to change the white balance in post-production. So, it's important to make sure your white balance settings are correct at the time of shooting. For the most part, it's fine to shoot in [AUTO]. However, it's a good idea to pay attention to your white balance settings before you start shooting and adjust them according to your needs.
Finally, we will introduce an exemplary way to set up N-Log footage for color grading.
We will run through the process using two different kinds of video editing software: Adobe Premiere Pro and DaVinci Resolve.
Let's start with Premiere Pro.
First, you need to change the color space. In the project panel, go to [Modify] and select [Color]. In the [Modify clip] window, set [Override Media Color Space:] to [REC. 2020], and then click [OK].
*Other setting options of Override Media Color Space can be selected for your needs.
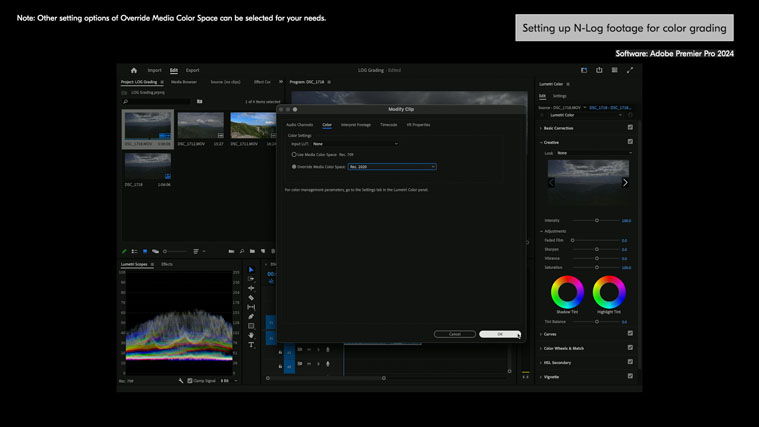
Now you are ready to start color grading in the Lumetri Color panel.
Now let's run through how to set up your footage for color grading in DaVinci Resolve.
Create a new project. Go to [File] in the menu bar and open [Project Settings]. Open the [Master Settings] tab in the [Project Settings] window, set the frame resolution and frame rate in the [Timeline Format].
Open the [Color Management] tab and set [Color Space & Transforms].
Select [DaVinci YRGB Color Managed] in [Color science] and uncheck [Automatic color management]. Select [SDR Rec.709] in [Color processing mode]. Select [Rec.709-A] in [Output color space].
*Other color processing modes can be selected for your needs.
*Select the output color space depending on what color gamut you need to output in. For the output of Rec.709, select [Rec.709-A] for Mac and [Rec.709 (Scene)] for Windows.
Click [Save] to close the window.
Open the Media page and add video files that you want to color grade to the media pool.
Open the Edit page and add the video files to the timeline.
Now you are ready to color grade your footage on the Color page.
The steps we introduced in this article are just for reference purposes. It's always good to find a process that best fits your own workflow. Shooting in N-Log gives you a lot of flexibility in post-production, and lets you deliver videos with exactly the look and feel that you wanted.