SB-5000
Camera Functions
Basic Operations
Procedure
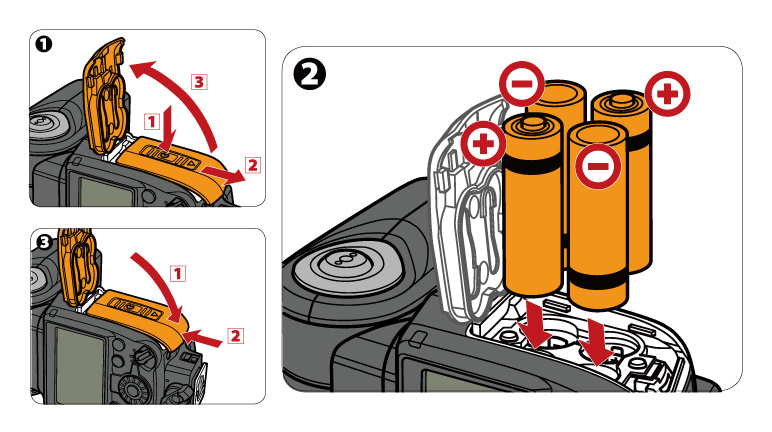
STEP 1: Inserting the batteries

 While pressing the battery-chamber cover lock release,
  slide the battery-chamber cover and
 open it.
 Insert the batteries following the [+] and [−]
marks.
Insert the batteries following the [+] and [−]
marks.
 Push and slide the battery-chamber cover to close it.
STEP 2: Attaching the SB-5000 to
the camera
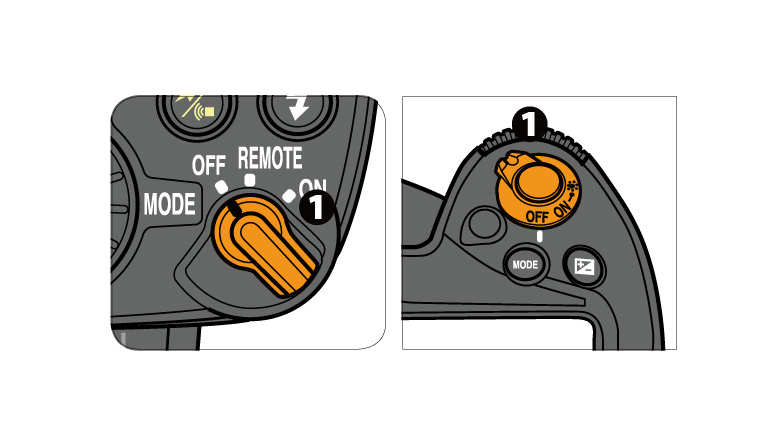
Make sure the SB-5000 and the camera
are turned off.
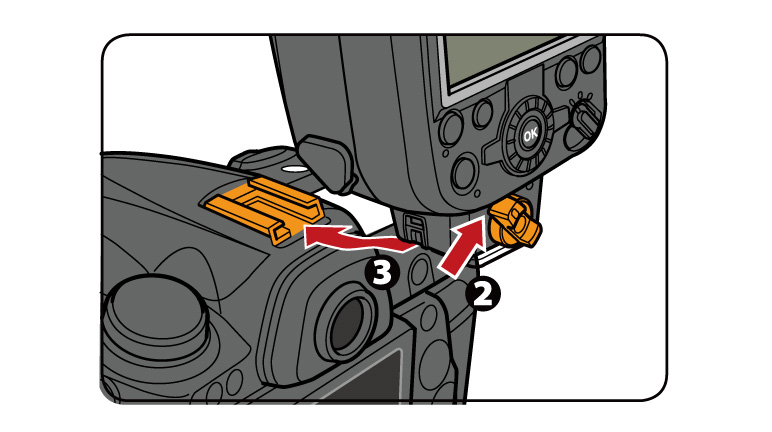
Lock the Speedlight in place
Turn the mounting foot lock lever clockwise until it stops at the mounting foot lock index.
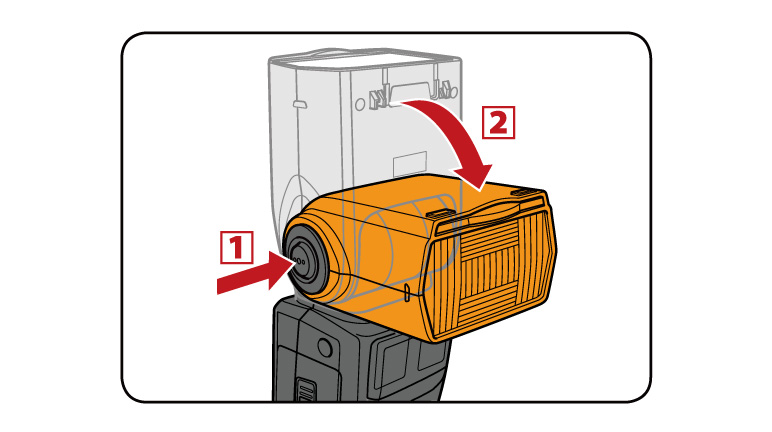
STEP 3: Adjusting the flash head
While holding down the flash head tilting/rotating
lock release button, adjust the flash head to the forward-facing position.
- The flash head is locked when tilted 90° up or set in the forward-facing position.
- The flash head is locked when tilted 90° up or set in the forward-facing position.

LCD indicator for flash head status
1: Flash head is set in the forward-facing position.
2: Flash head is set at angle. (Flash head is tilted up or rotated to the right or left.)
3: Flash head is tilted down.
1: Flash head is set in the forward-facing position.
2: Flash head is set at angle. (Flash head is tilted up or rotated to the right or left.)
3: Flash head is tilted down.
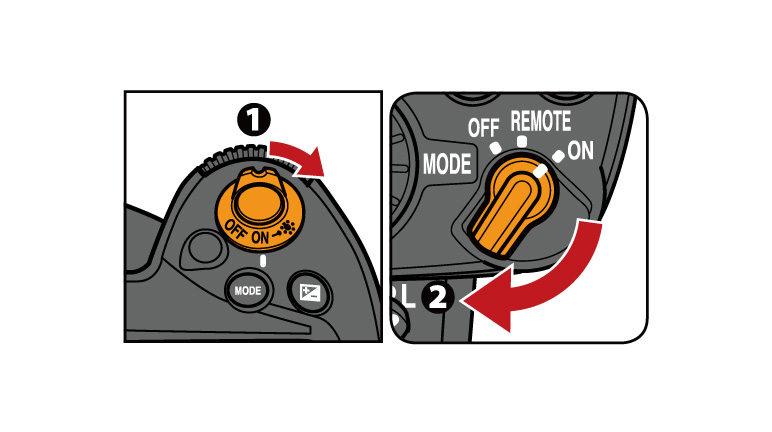
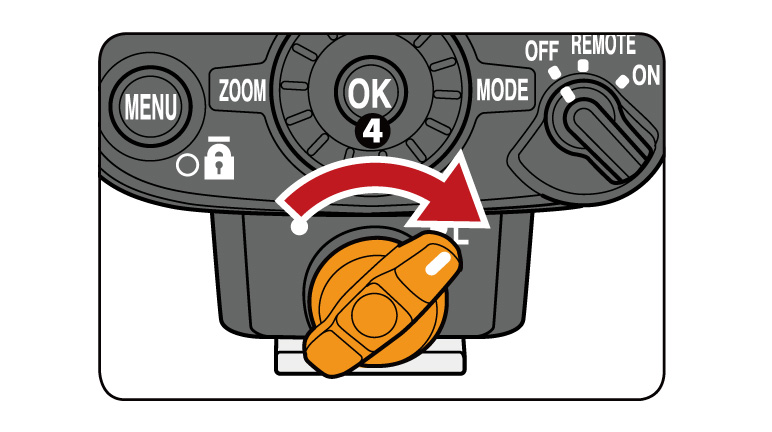
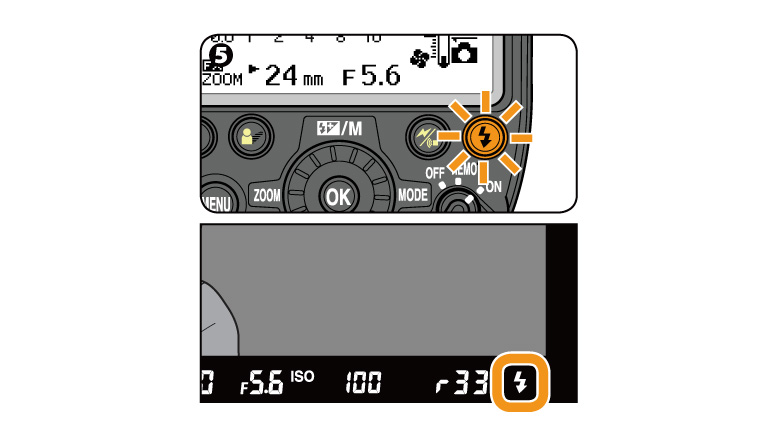
STEP 4: Turning the camera and SB-5000
on
Turn the camera on.
Set
the SB-5000’s power switch to [ON].
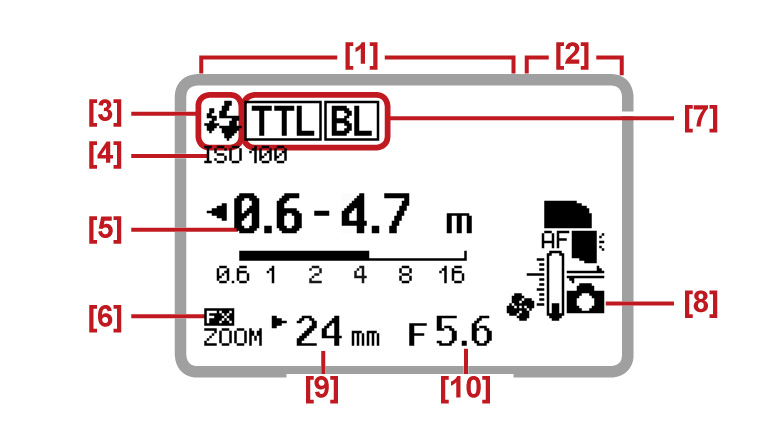
1: SB-5000 flash information
2: SB-5000 status icons
3: Monitor pre-flashes
4: ISO sensitivity
5: Effective flash output
6: FX format
7: Flash mode
8: Connected to a CLS-compatible camera
9: Zoom head position
10: Aperture f-number
2: SB-5000 status icons
3: Monitor pre-flashes
4: ISO sensitivity
5: Effective flash output
6: FX format
7: Flash mode
8: Connected to a CLS-compatible camera
9: Zoom head position
10: Aperture f-number
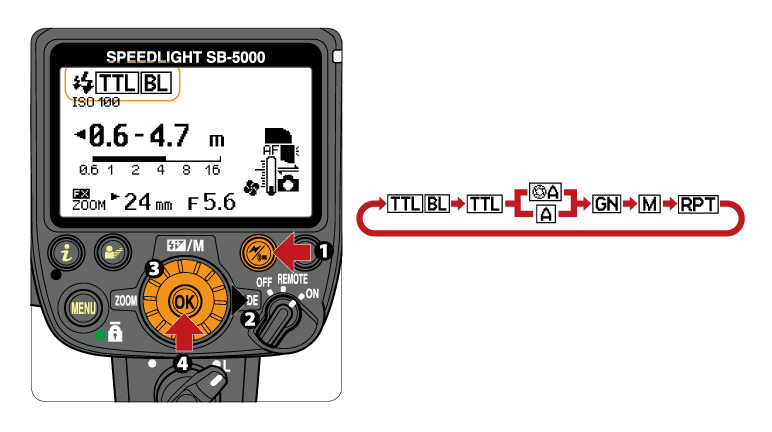
STEP 5: Selecting the flash mode
Press the wireless setting button to choose single flash-unit
mode.
Press the rotary multi selector  to highlight the flash mode.
Use the rotary multi selector to display .
.
 Press
the OK button. Changing the flash mode
Press
the OK button. Changing the flash mode
Pressing the rotary multi selector or rotating it clockwise changes the available flash mode icons displayed on the
LCD.
or rotating it clockwise changes the available flash mode icons displayed on the
LCD.
Pressing the rotary multi selector
Basic Operations: Related Functions
View information on functions related to Basic Operations.
More SB-5000 Tips and Tricks