Digitizing Film Ⅱ, Master Class: Digitizing Negatives and Positives
Narrated by YAMANO Yasuteru
Basic Techniques (35 mm Slide Film)
Photographing slide film is basically run-of-the-mill macro photography,
differing only in that the subject is a frame of film, so you need only take the same
care that you would in accurately photographing any other small object. The biggest
difference between slide film and most other subjects is that the colors and tones
have already been adjusted to create a finished work.
1.
Inserting Slides
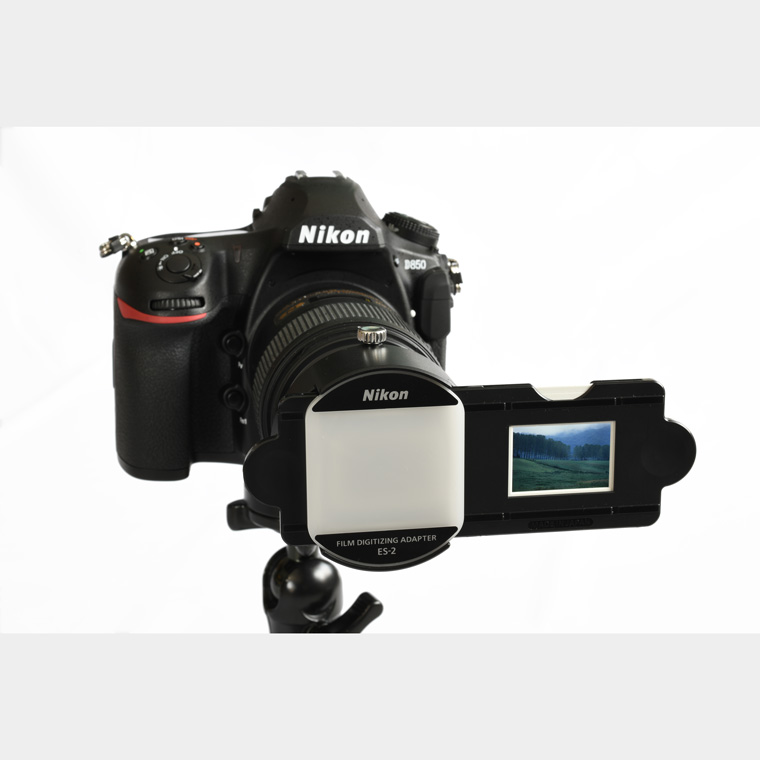
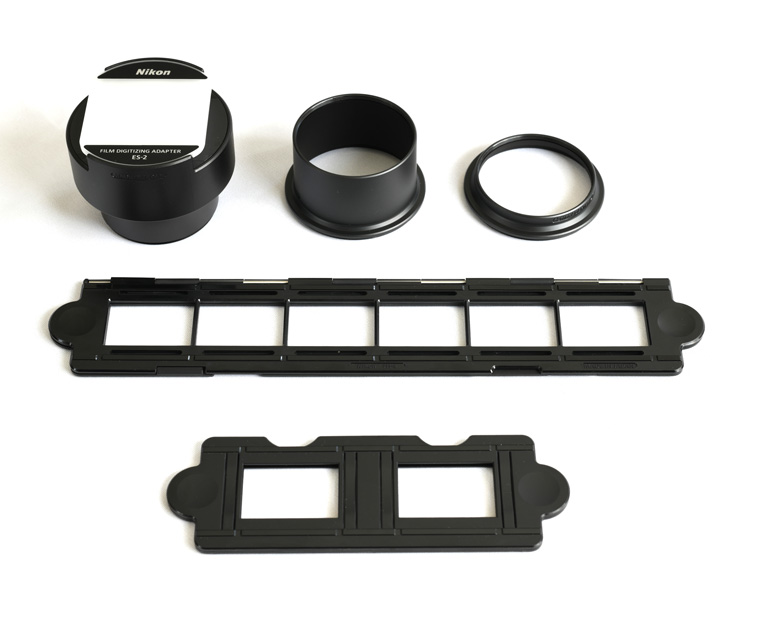
Mounted slides can be inserted into the FH‑5
slide mount holder (below, “FH‑5”). Unmounted
slide film can be inserted into the FH‑4.
After removing
dust and lint from the film with a blower, insert the holder into the ES‑2
holder insertion slot.
2. Adjusting Camera Settings
Given that your subject
is, as noted above, a finished photograph, it is important that settings be adjusted
so that its colors and tones can accurately be converted to digital. Colors and tones
can be regulated using Picture Controls, and exposure modified appropriately by adjustments
to metering mode and exposure compensation. Effective use can also be made of white
balance in compensating for the light source. Choosing NEF (RAW) format lets you use
NEF (RAW) processing for precise adjustments to white balance and Picture Controls
after shooting. Exposure must however be tuned before shooting, regardless of the
option selected for image quality. The description that follows provides settings
for recording JPEG or TIFF pictures for immediate use.
The recommended
settings are given below. See Sections 2.1 through 2.3 for details.
White
balance: Keep white (reduce warm colors)
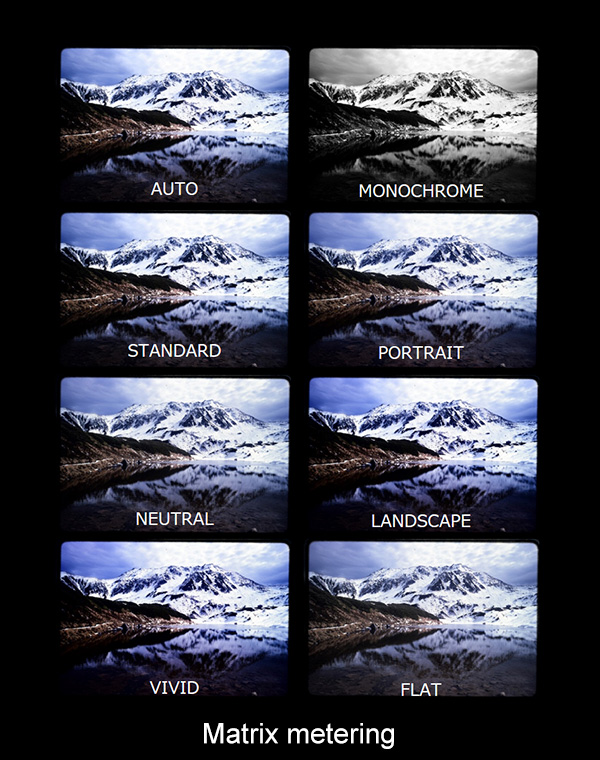
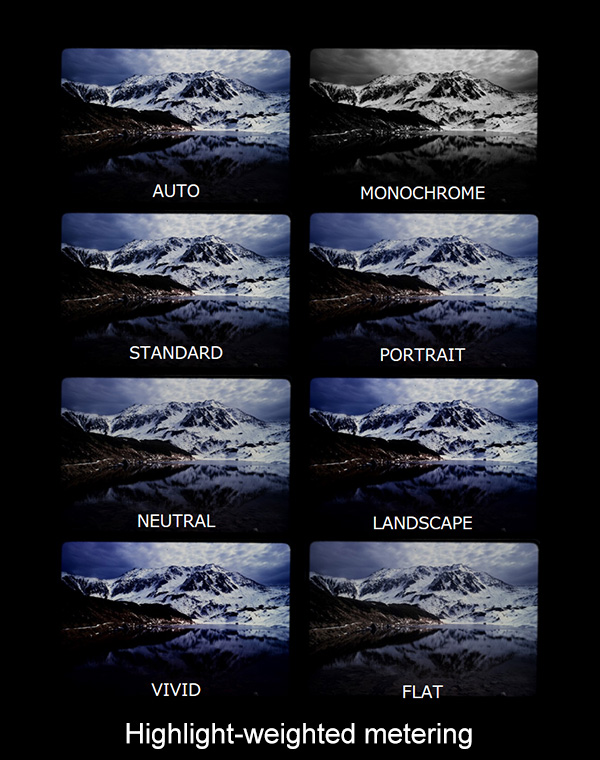
Picture Control: Flat
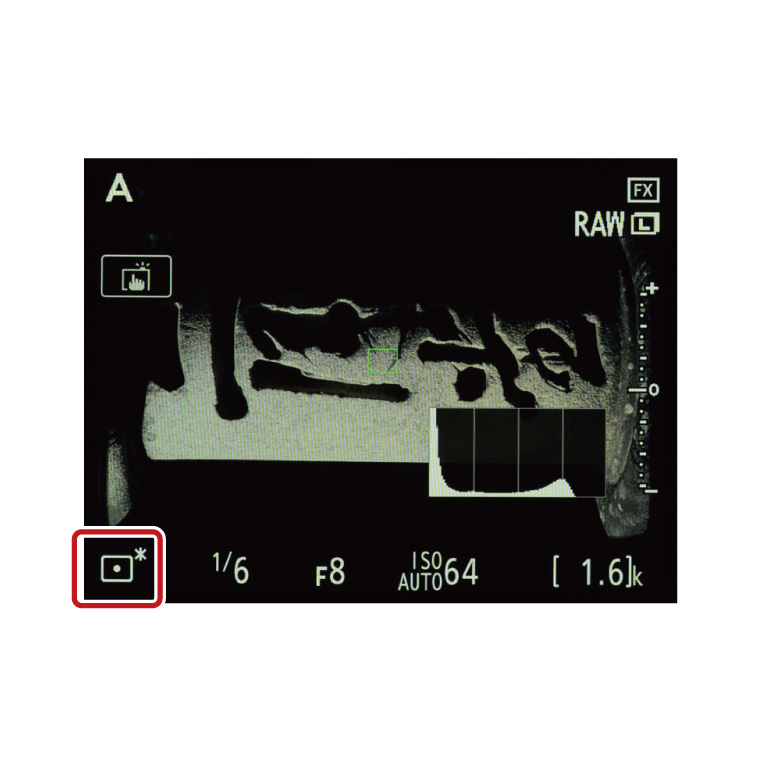
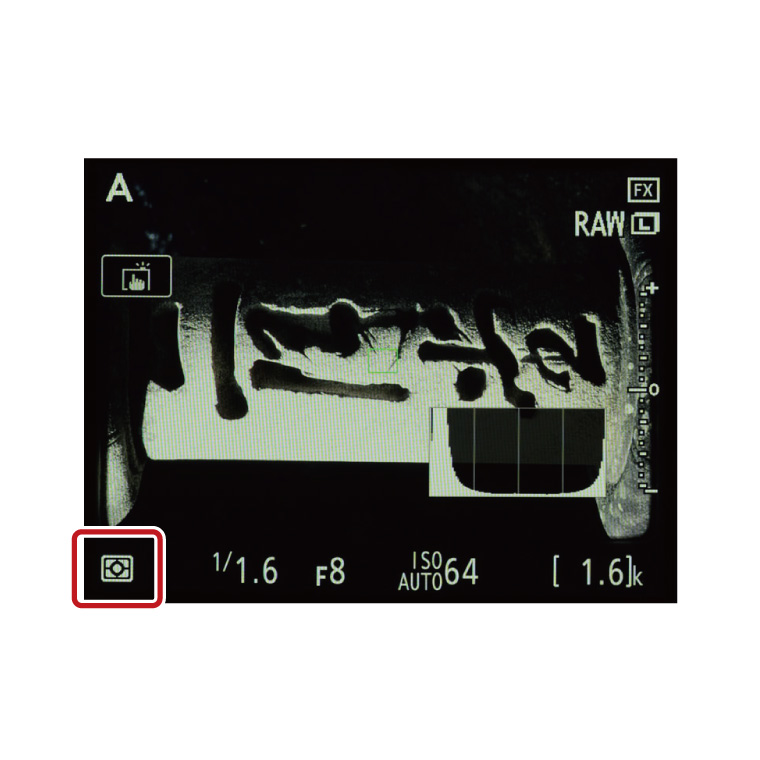
Metering: Matrix metering or Highlight-weighted metering
2.1 White Balance
Turning first to white balance, choose
Keep white (reduce warm colors) for slides featuring subjects that
vary widely in color and brightness. Keep white (reduce warm colors) may not however
have the desired results if the slide is dominated by a single color (as when the
subject is a blue sky or a green field); better results can often be achieved by selecting
Preset manual and measuring white balance without the slide inserted.
Given the above, it would probably be best to try Keep white (reduce warm
colors), switching to Preset manual if you are not satisfied
with the result.
2.2 Picture Controls
When photographing slide film, experiment first with the Flat
Picture Control. Slide film is processed to emphasize contrast and saturation, and
it is therefore desirable to keep any further in-camera image enhancement to a minimum.
Although there will of course be situations in which Standard or
Vivid would better match your artistic intent, it seems more efficient
to first view the image with Flat selected and then adjust Picture
Control parameters or choose Standard or Vivid only
if you feel that contrast and saturation require heightening.
2.3 Metering and Exposure
One approach to metering
is to choose matrix metering and adjust exposure compensation as necessary, but you
can instead select highlight-weighted metering if you would like to preserve details
in highlights. Given that highlight-weighted metering adjusts exposure to preserve
details in highlights, it may however not produce mid-tones with the desired brightness
or dynamic range, in which case you can get the desired results by adjusting exposure
compensation or the contrast and brightness Picture Control parameters.
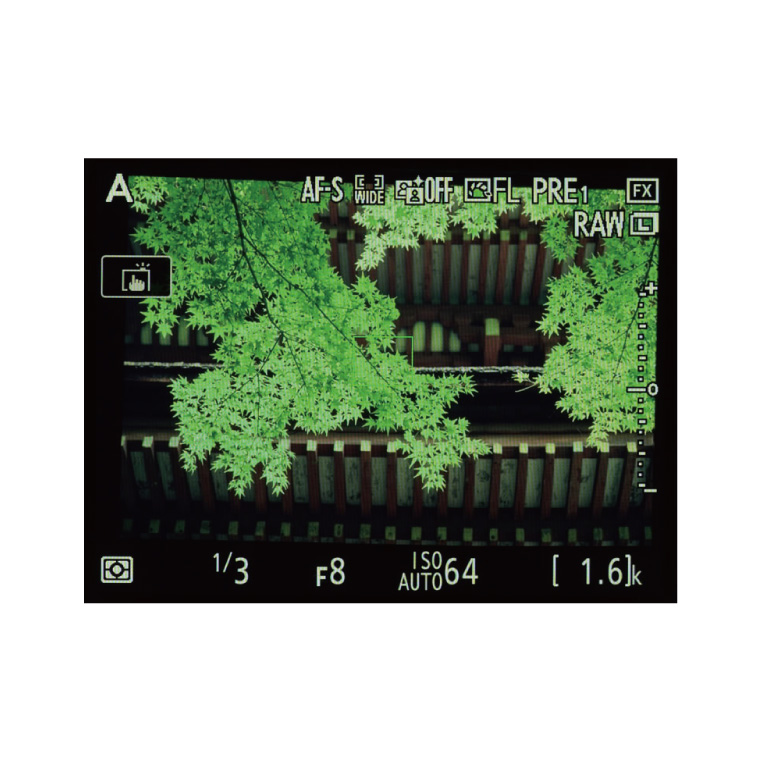
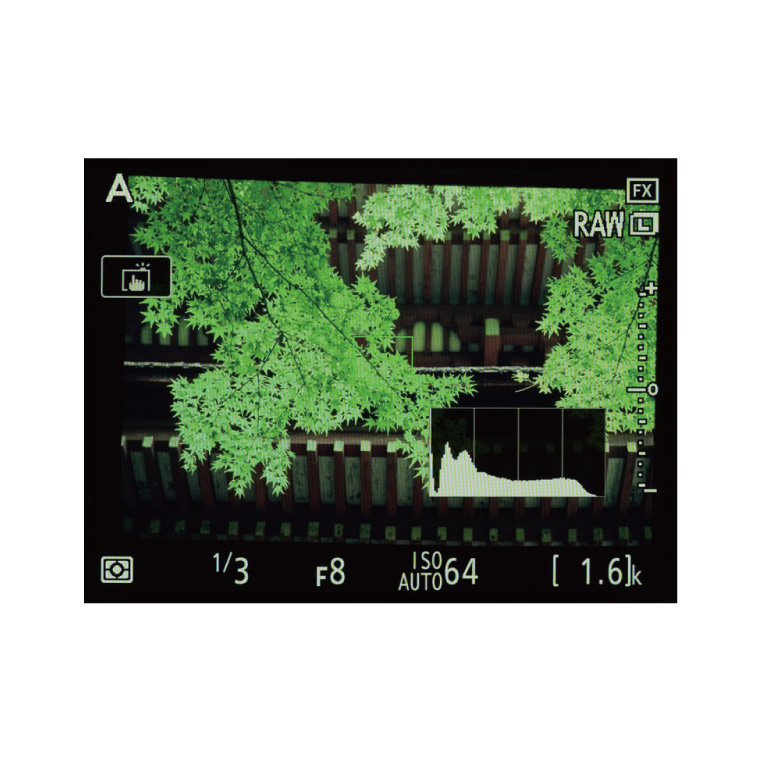
When adjusting exposure, you can choose and adjust Picture Controls and hone exposure
while viewing the histogram in live view to ensure that highlights are preserved.
To enable the histogram display in live view, press ![]() to preview exposure and then press the
to preview exposure and then press the ![]() button a few times. I encourage you to try it,
as being able to judge whether tone information is preserved in highlights or shadows
before shooting can be a tremendous confidence booster.
button a few times. I encourage you to try it,
as being able to judge whether tone information is preserved in highlights or shadows
before shooting can be a tremendous confidence booster.
3. Taking Photographs
Insert the film in the
ES‑2, point the diffuser screen at the light source, and frame the
shot.
After that, you need only focus and shoot. Photographs are recorded in
the format selected for Image quality and, when an NEF (RAW)
option is selected, NEF (RAW) recording.
More on the Negative Digitizer
Features That Cannot Be Used with
the Negative Digitizer
While the negative digitizer is very
useful, there are a number of features with which it can’t be used; I’ve
listed these below so that this won’t be mistaken for a malfunction. While the
explanation is obvious in the case of features that disable live view altogether,
in other cases it can be confusing to press the ![]() button to select Negative digitizer, only to find
it grayed out. As a regular user of silent photography, my first instinct is to check
whether silent photography is enabled. Frequent users of bracketing, HDR, and silent
photography should take note, as the problem is easily solved once the connection
between these settings and the negative digitizer is understood.
button to select Negative digitizer, only to find
it grayed out. As a regular user of silent photography, my first instinct is to check
whether silent photography is enabled. Frequent users of bracketing, HDR, and silent
photography should take note, as the problem is easily solved once the connection
between these settings and the negative digitizer is understood.
(1)
Interval timer shooting (live view not available)
(2) Multiple exposure (live
view not available)
(3) Focus shift shooting (live view not available)
(4)
Bracketing (Negative digitizer not available)
(5) HDR (High
Dynamic Range; Negative digitizer not available)
(6) Silent
live view photography (Negative digitizer not available)
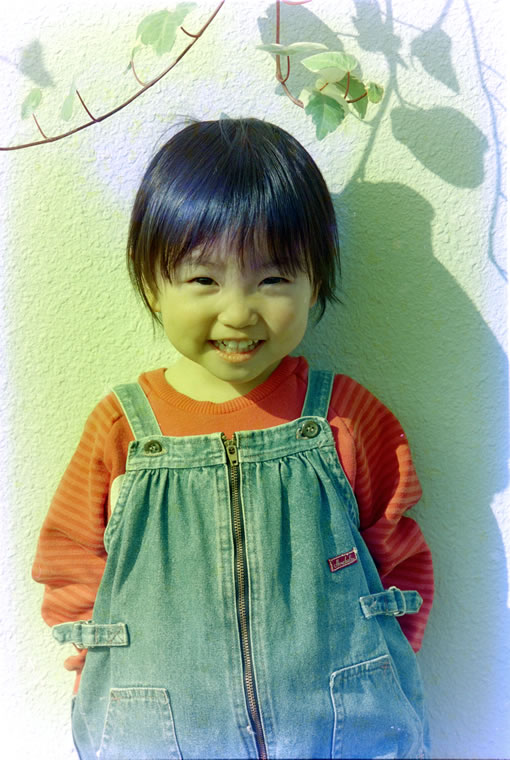
Handling Old Color Negatives
There’s something I’ve noticed since the D850 came out with
negative digitizer and I started using it as a handy tool for keeping my film in order:
readers no doubt remember the “vinegar syndrome” that degraded the base
material in film of a certain age, rendering it unusable, but while my store of film
fortunately was unaffected, I have noticed uneven colors caused by color changes and
fading in many of the color negatives I have processed using the D850’s negative
digitizer. Given that the film is over 30 years old, such decay is hardly surprising,
but it escaped my attention because the color of the base makes slight changes in
color hard to detect. When I first encountered this phenomenon I thought my camera
was at fault, but once I noticed that a substantial amount of film exhibited no noticeable
fading and that specific makes of film showed a tendency to fade, I realized that
film degradation was the culprit. Although I cannot offer a universal solution, as
film degradation is widely known to heavily dependent on storage conditions, I can
give a few examples of how to handle it.
While these are not by any
means perfect solutions, here are a few examples of how I have dealt with the color
fading that occurs as film ages.
Cropping
Color changes caused by film degradation vary
from one part of the image to another in both type and degree, resulting in uneven
colors that produce a sense of dissonance. Color changes wouldn’t be a problem
were they consistent over the entire image, as the camera would handle them as it
would a base of a different color. It follows that if you can restrict the scanned
area to a portion of the frame where the degradation is consistent, the dissonance
caused by uneven colors would be lessened or eliminated entirely. While this method
cannot be used if the degradation has produced inconsistent effects within the area
you want to scan, feel free to try it where conditions permit.
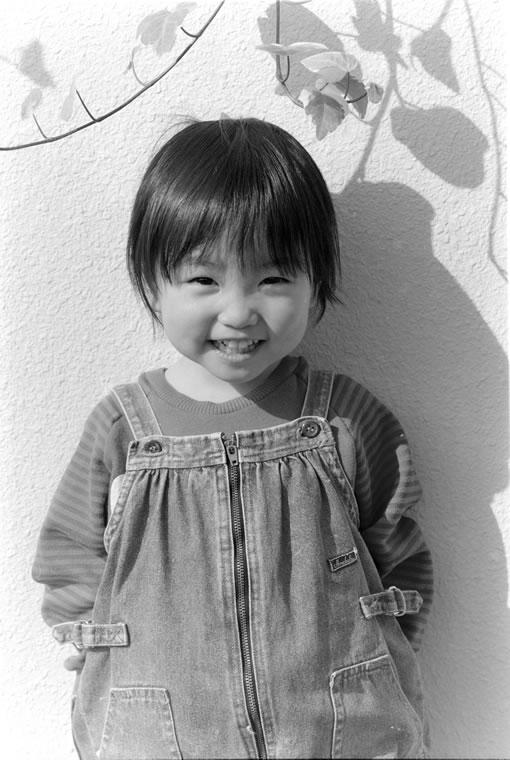
Converting
to Black-and-White
While admittedly it seems a waste not to
use color information when digitizing color film, this is a solution that can be applied
where age has caused colors to deteriorate and cropping cannot be used. I employ it
myself when dealing with color negatives marred by spotty colors, as it is better
than not digitizing the image at all. Even if color data cannot be recovered, heritage
images can still be preserved in black-and-white. It may even be appropriate to use
this not only as a way to rescue faded pictures but as a new and unexpected way to
enjoy ordinary images by converting them to works of art.
When Colors Don’t Look Right
For reasons having to do with ease of use, the D850’s negative
digitizer supports only exposure adjustment and lacks more challenging color and level
controls. While it produces good results with most film, it may fail to produce the
desired hues in photos dominated by a single color, for example pictures in which
a bird or the like occupies a small part of the frame with the remainder consisting
entirely of blue sky.
In cases like these, I choose not to use the negative
digitizer but instead digitize the film as I would a slide; I then use image editing
software to reverse and adjust the colors, including correcting for the color of the
base. I shoot the images in NEF (RAW) format, which can withstand extensive editing.
Readers are probably curious as to the quality of images digitized by this method. To the key question of whether the image information recorded on the film is preserved in the digital image data, we can answer “Yes”.
With over 45 million pixels, the D850 has an input resolution of over 5000 dpi with respect to a frame of 35 mm film, high enough to reliably capture the individual grains in most film. Resolution, then, is not an issue; the next concern is color reproduction and tone range. The reproduction of color negatives can be safely left to the D850’s negative digitizer, while with slides one need only adjust Picture Controls to accurately capture color and tone. The key to the latter is choosing the Flat or Neutral Picture Control and adjusting the individual parameters with reference to the histogram.
The image data so obtained can, if the original on film is sufficiently sharp, be printed at A1 size (594 mm × 841 mm, or 23.4 in. × 33.1 in.) with an output resolution of about 250 dpi, quality sufficient for display. I encourage everyone to bring their existing film assets into the digital age via digitization.
Tips and Tricks > Digitizing Film Ⅰ, the Basics: Digitizing Negatives
Profile of YAMANO Yasuteru
Photographer and researcher of photographic techniques. Born in 1954 in Kagawa. Has been publishing photos and articles in astronomical journals since the 1970s. Has published many digital photos and articles relating to digital astronomical photography since the year 2000. Member of the Society of Photography and Imaging of Japan (SPIJ).


