D850
Camera Functions
Negative Digitizer
To record positives of copies of film negatives, press the ![]() button and select Color negatives or Monochrome
negatives for Negative digitizer.
button and select Color negatives or Monochrome
negatives for Negative digitizer.
Procedure
01. Position the negatives in front of a featureless white or graybackground.
We recommend using an AF-S Micro NIKKOR 60mm f/2.8G ED or other micro lens and either natural light or an artificial lightsource with a high Ra (color rendering index), such as a lightbox or a high-CRI fluorescent lamp.
We recommend using an AF-S Micro NIKKOR 60mm f/2.8G ED or other micro lens and either natural light or an artificial lightsource with a high Ra (color rendering index), such as a lightbox or a high-CRI fluorescent lamp.
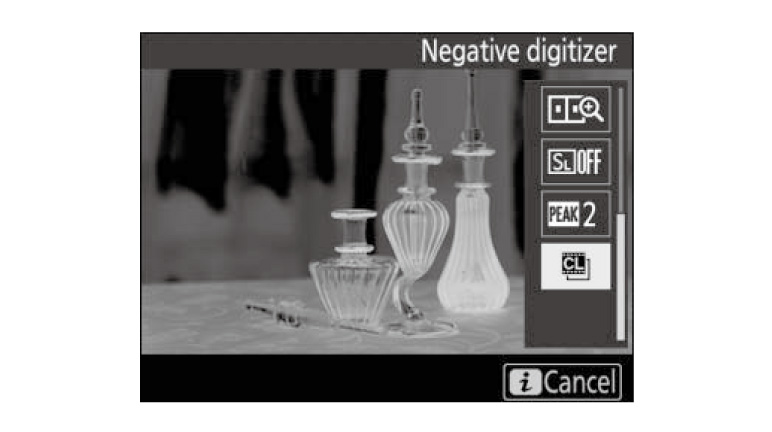
02. In live view, press the  button, highlight Negative digitizer, and press
  .
.
The colors in the display will be reversed.
The colors in the display will be reversed.
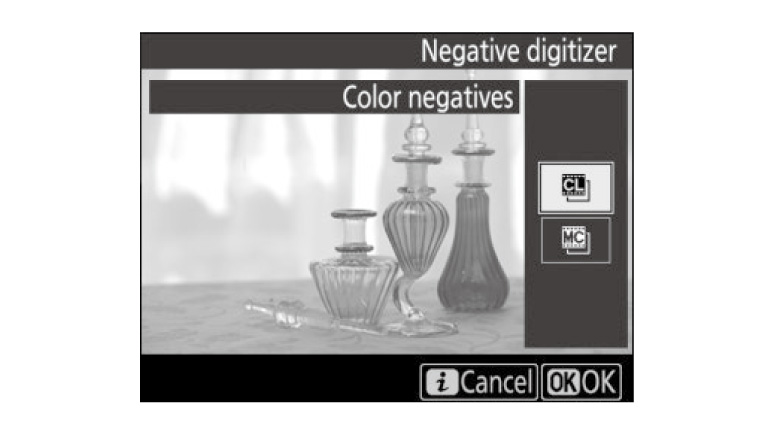
03. Choose the film type.
Highlight Color negatives or Monochrome negatives and press OK.
04. Compose the shot to capture a frame of the film negative.
Highlight Color negatives or Monochrome negatives and press OK.
04. Compose the shot to capture a frame of the film negative.
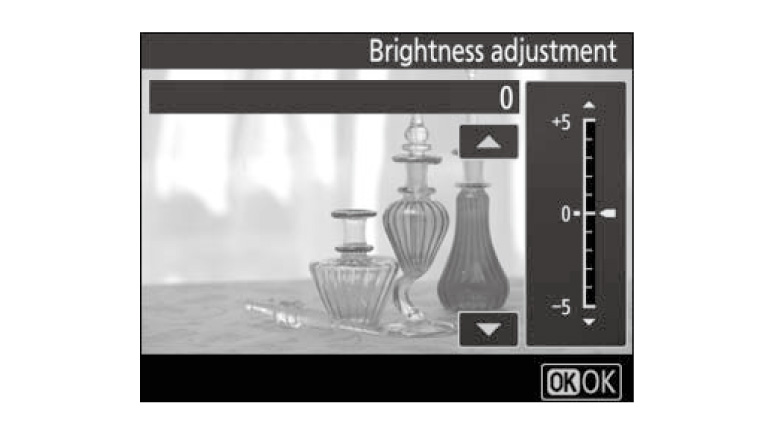
05. Adjust exposure.
Press to display brightness adjustment options and press
  or
or  to adjust
exposure.
to adjust
exposure.
To view your subject at a higher magnification, press. Press to proceed.
06. Take the photograph.
Press the shutter-release button all the way down to take the photograph and save it in JPEG format.
Press
To view your subject at a higher magnification, press
06. Take the photograph.
Press the shutter-release button all the way down to take the photograph and save it in JPEG format.
More D850 Tips and Tricks