D850
Digitizing Film Ⅰ, the Basics: Digitizing Negatives
Narrated by YAMANO Yasuteru
Digitizing Film
“Digitizing
film” is the process of creating digital data from the image information found
in photographic film (below, “film”). Whereas formerly the main method
for digitizing film used a specialized piece of equipment known as a film scanner,
with the introduction of high-resolution digital cameras, high-quality digital data
can now be produced using a digital camera to copy film at a reproduction ratio of
1∶1.
The demand for digitizing film comes not only from those who took
large numbers of photos as a hobby in the film-camera era, but also from young photographers
enjoying the recent boom in taking photos using film cameras (including disposable
cameras) and having the results digitized at a photo lab.


The “Negative Digitizer”
While technically photographing film with a digital camera is all that
need be done to digitize film, the image processing needed to create correctly-colored
positives has proven difficult, particularly in the case of negative film, which has
an orange base. Here I introduce the D850’s negative digitizer
feature, which uses in-camera processing to generate correctly-colored positives by
reversing the colors in photos of film negatives. While positives (slide film) can
be digitized just by photographing slides at high reproduction ratios, getting good
results requires techniques that will be introduced in the following chapter, “Digitizing Film Ⅱ, Master Class: Digitizing Negatives
and Positives”.
Note that pictures taken using the negative
digitizer will be recorded in JPEG Fine★ format regardless of the option
selected for Image quality.


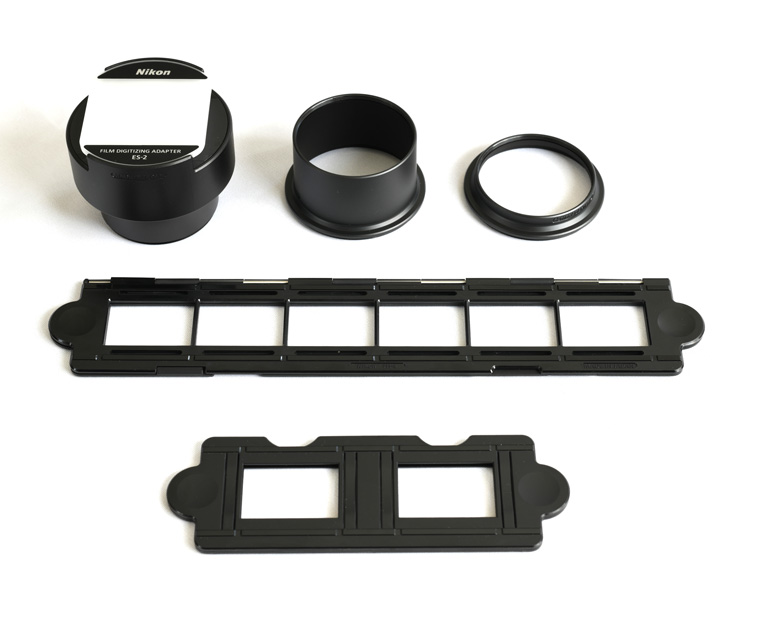
Required Equipment
In addition to the D850, you’ll need a 60 mm Micro NIKKOR lens for
full-frame shots of 35 mm film and an ES‑2 film digitizing adapter
(below, “ES‑2”) to hold the film in place in front of
the lens. Although an ES‑2 is not required if you have some other means of keeping
the film at right angles to the optical axis at a set distance from the lens while
blocking light from the sides, in practical terms I think you’ll find it best
to employ the ES‑2 for reasons that include ease-of-use.
Choosing a Light Source
A light source is required when digitizing film.
While you can
use the light entering a window in daylight, to digitize large amounts of film or
to digitize film after the sun has set, it’s probably best to have a small film-viewing
lightbox lit by a lamp with a high color-rendering index. Nevertheless, given that
in most cases light sources of the sort you’ll find at home (such as ceiling
lights) are for all practical purposes sufficient even for the task of digitizing
color film, which requires attention to the characteristics of the light source, you
can give it a try with whatever lighting you have to hand. For black-and-white film
brightness is all that matters, so any type of lighting will work as long it’s
bright enough.
Basic Techniques: Digitizing 35 mm
Negatives
While the ability to create positives from
negative film is one of the more notable features of the D850’s negative digitizer,
not only can it record negatives in positive form, but it also reverses the colors
in negative film during live view.
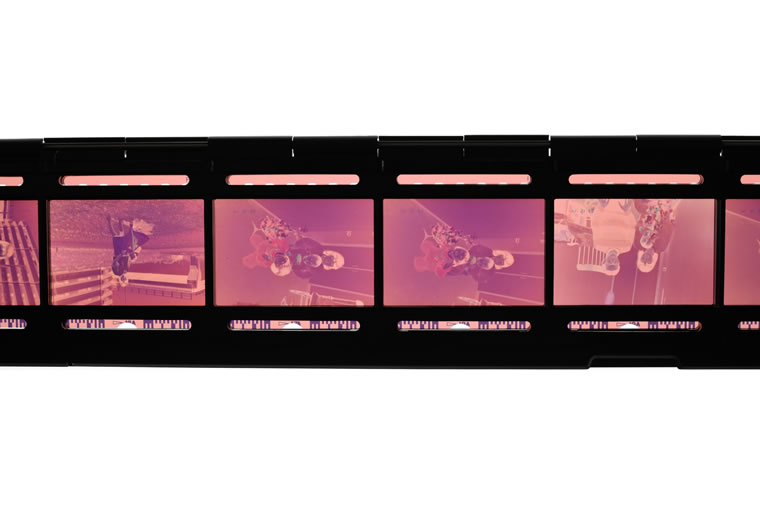
1. Inserting Film
Unmounted strip film in sections of six frames or less can be inserted
into the FH‑4 strip film holder (below, “FH‑4”).
Slides can be inserted in the FH‑5 slide mount holder (below, “FH‑5”).
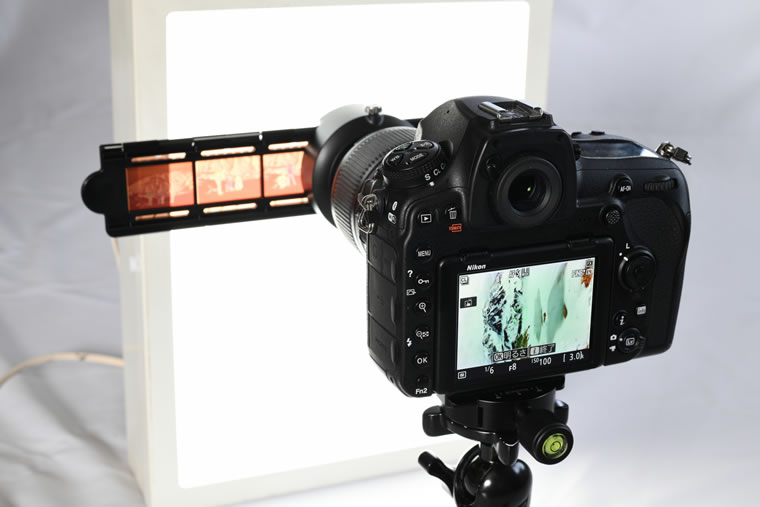
After removing dust and lint from the film with a blower, insert the
holder into the ES‑2 holder insertion slot.

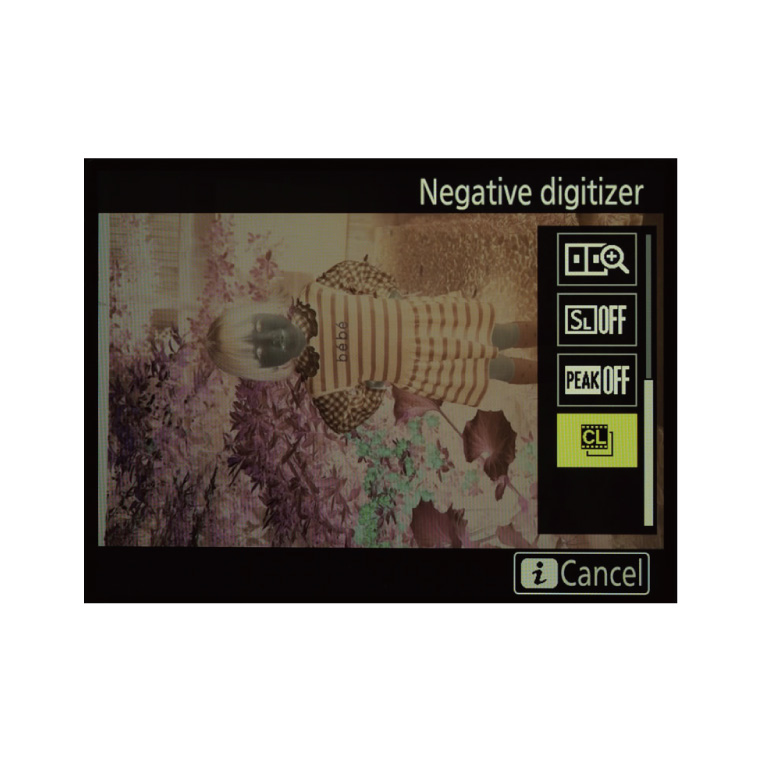
2. Starting the Negative Digitizer
Aim the ES‑2’s
diffuser screen at the light source and
(1) rotate the live view selector to
the live view photography position and press the ![]() button to start live view, then
button to start live view, then
(2) press
the ![]() button
and select Negative digitizer, and finally
button
and select Negative digitizer, and finally
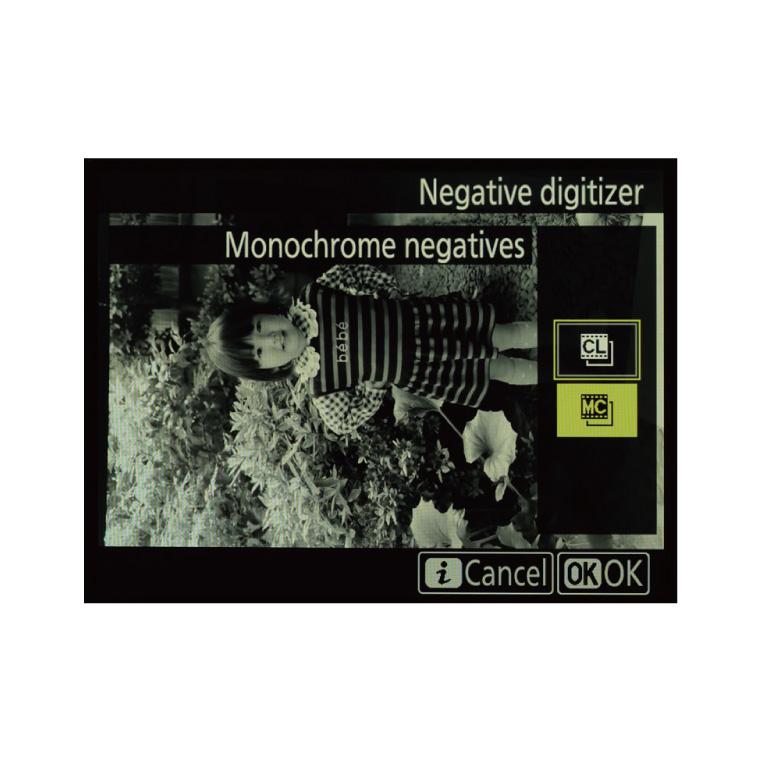
(3) select Color
negatives or Monochrome negatives according to the type
of film. The Monochrome negatives option can be used even with color
film.

3. Taking Photographs
3.1 Framing
First, frame the shot. Framing the area you want to digitize so that
it fills the monitor means you won’t have to crop the image later, which is
particularly handy if you want to use SnapBridge to upload the image to a smartphone
or tablet for immediate use.
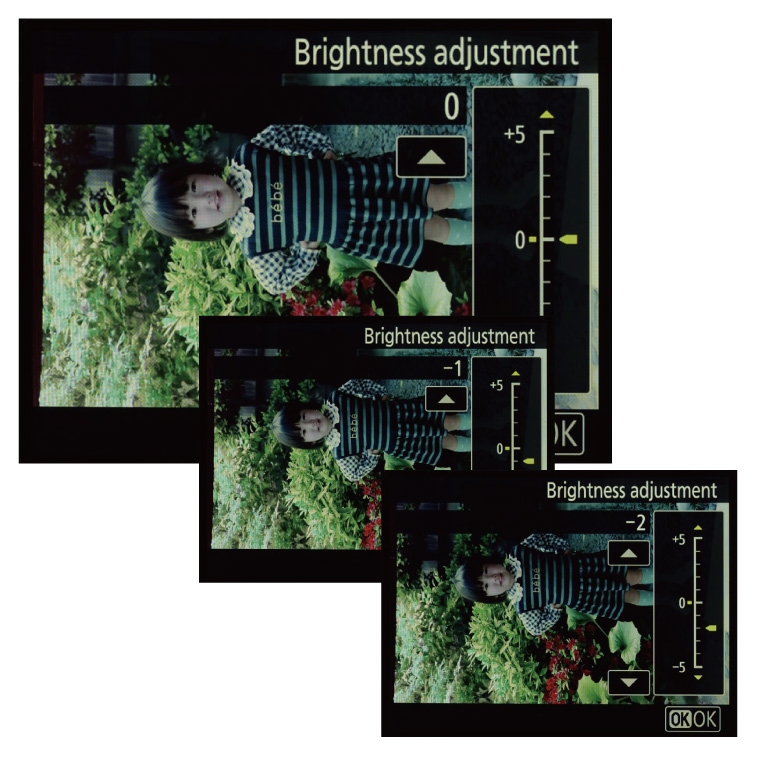
3.2 Adjusting Brightness
Next, check the brightness of the positive image in the monitor and
adjust brightness as necessary. The camera adjusts brightness automatically, but you
can make the image brighter or darker by pressing ![]() and using the multi selector or touch controls to
adjust brightness in the Brightness adjustment display. Exposure
can be adjusted by ±5 EV.
and using the multi selector or touch controls to
adjust brightness in the Brightness adjustment display. Exposure
can be adjusted by ±5 EV.
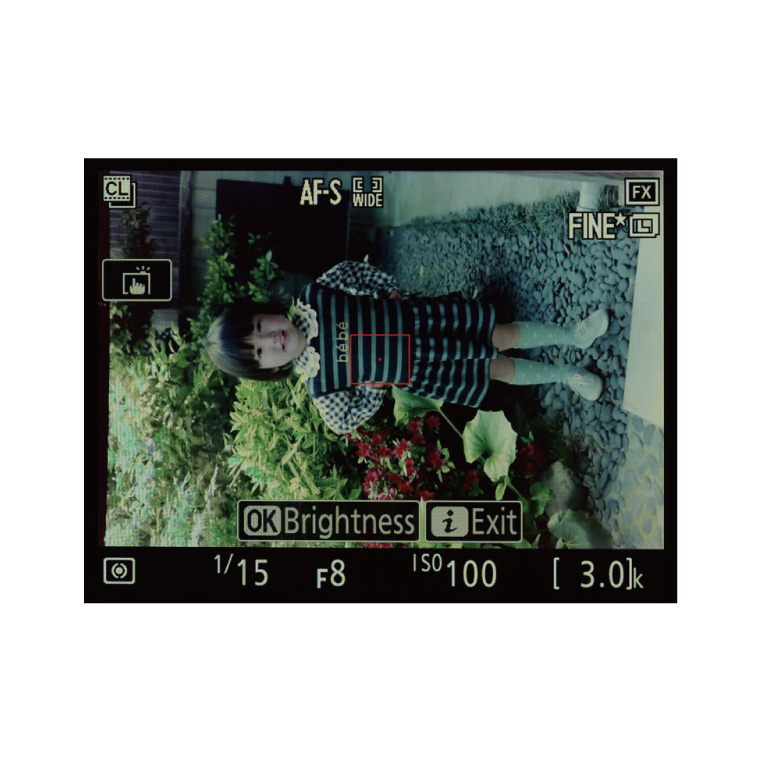
3.3 Focus
Now all that’s left to do is focus
and take the photograph.
Autofocus works well in most cases. Although some
cases the camera may fail to focus if the portion of the subject (film) in the focus
point is low in contrast, this can usually be solved by choosing wide-area AF as the
AF-area mode, moving the focus point to a high-contrast area of the subject, or focusing
manually.
Note: Shutter speeds may slow depending on the light source
and the condition (density) of the film, but given that the film will be held in place
in a film digitizing adapter or the like subject blur will not be a problem. Slow
shutter speeds may result in visible “noise” (image artifacts) in the
live view display, but rest assured that the final photograph, having been properly
exposed at a slow speed, will be comparatively free of noise.
In the
next chapter, “Digitizing Film Ⅱ, Master Class:
Digitizing Negatives and Positives”, I will introduce how to digitize slides
together with advanced techniques for digitizing negatives.
Using an HDMI cable to connect the camera to a TV or other large display makes it easier to use the D850’s negative digitizer or digitize slides.
While it goes without saying that changes to camera settings are more easily viewed when menus and the like are displayed on a large screen rather than in the camera monitor, it is also easier to check whether pictures are straight and to quickly detect small differences when choosing the best image from a series.
And I’ve noticed another benefit: when the images are displayed at a large size, I forget that I’d begun with the purpose of digitizing film and instead unwittingly find myself enjoying the show, enjoying getting caught up in nostalgia.
Working by oneself on a computer monitor is fun enough, but using a large-screen TV or the like to show pictures to an audience can generate lively conversation. While you may say that this makes more for a viewing party than it does for getting any work done, it seems to me that the value of viewing pictures directly at a large size lies not only in making the work easier, but also in the new possibilities it reveals. Although I have been digitizing film since the film scanner era, I have never before enjoyed the work just for itself, so I thought I’d introduce you all to this technique.
Tips and Tricks > Digitizing Film Ⅱ, Master Class: Digitizing Negatives and Positives
Profile of YAMANO Yasuteru
Photographer and researcher of photographic techniques. Born in 1954 in Kagawa. Has been publishing photos and articles in astronomical journals since the 1970s. Has published many digital photos and articles relating to digital astronomical photography since the year 2000. Member of the Society of Photography and Imaging of Japan (SPIJ).