ZR
Video Shooting Settings Guide Practical Edition
Supervised by Kaz Ohata (Cinematographer)
Sample cinematography by Yoko Asazuma (Cinematographer)
The Nikon ZR compact cinema camera is perfect for many different video production scenarios, from daily vlog recording to professional cinematic work. This video introduces the setup and essential settings for creating videos with the ZR, including R3D NE RAW video shooting.
Index:
- 1. Recommended settings
- 2. Mastering the ZR
- 3. Basics of R3D NE RAW recording
- 4. Extending with accessories (Accessory list)
- 5. Wrapping Up
First, let's introduce our recommended settings.
By default, the ZR automatically turns off to save power when the standby timer expires. You can prevent this by selecting [No Limit] for [Standby timer] in custom setting [c3: Power off delay].

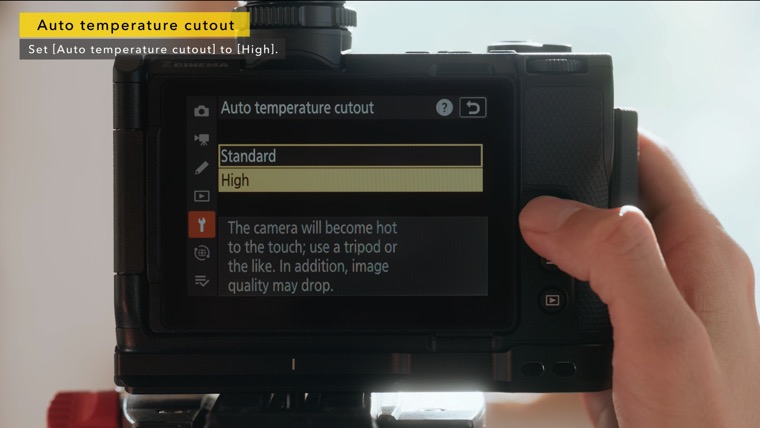
Select [High] for [Auto temperature cutout] in the setup menu to reduce the probability of the camera turning off automatically while being used for extended periods or in direct sunlight.
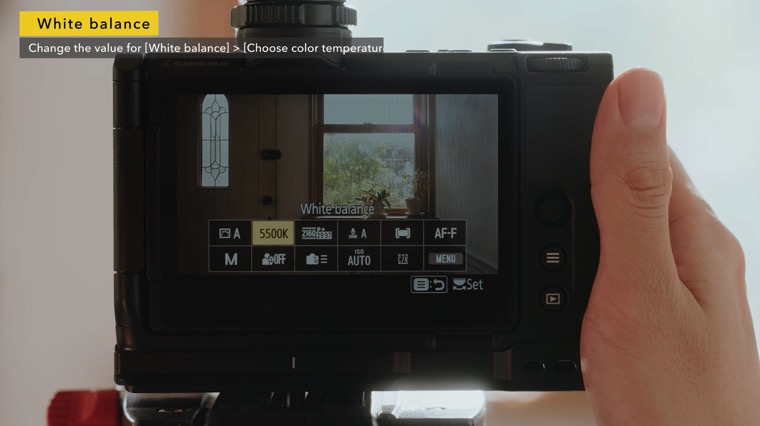
The default value for white balance [Choose color temperature] is 5000 K. You can adjust this value as needed.
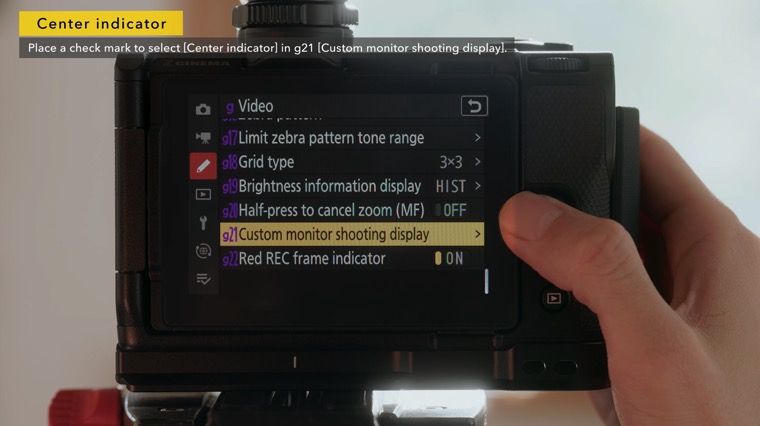
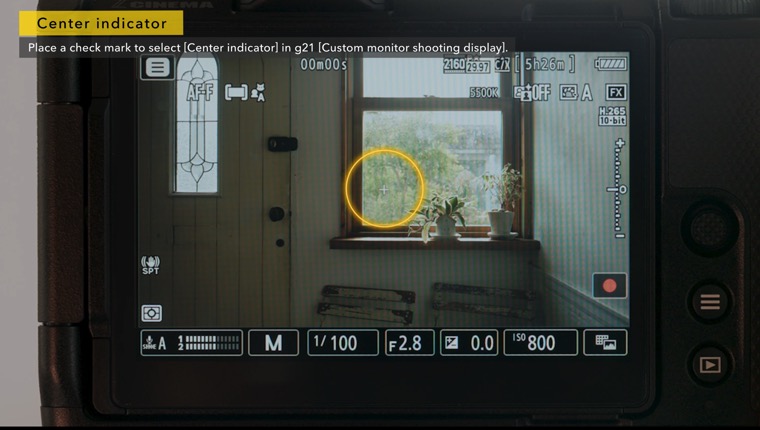
To display a crosshairs at the center of the frame, select it with custom setting g21 [Custom monitor shooting display].
To avoid having shooting information overlap your subject, select [Small] for [Monitor display size (Lv)] in the setup menu before switching the shooting display.

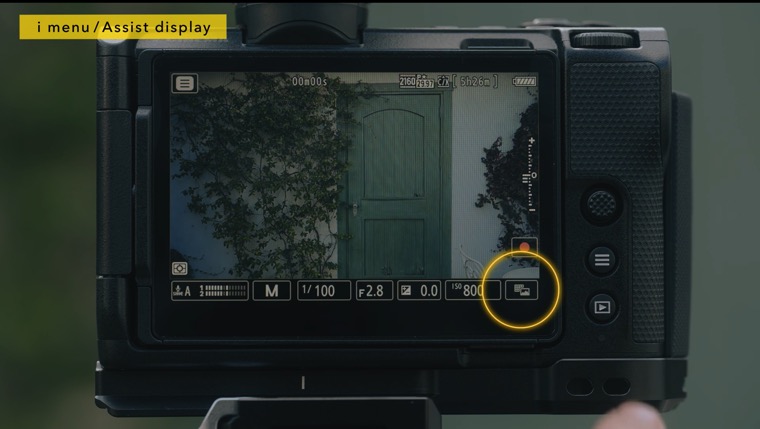
Let's look at some useful settings for mastering the ZR.
In addition to the frequently-used "i menu" functions, the ZR features multiple assist displays such as a framing grid, brightness information, and a red border indicating that recording is in progress.
The ZR offers four focus modes. With AF-F, the camera automatically tracks and focuses on the subject as it moves. This mode is effective in situations where manual focusing is difficult, such as when shooting with a gimbal.

You can also focus using touch AF by combining AF-F with auto-area AF. The [Move focus point] touch AF option allows for creative videography through gradual focus transitions*.
*The AF speed operates based on the setting value in g6 [AF Speed].

With AF-C, the camera tracks and focuses on the subject while the shutter-release button is pressed halfway. This mode is effective for cinematic shooting where subjects may be temporarily obstructed, or when precise control over focus is required.
Let's look at the essential basic settings for shooting RAW video with the ZR.
The ZR offers three types of RAW video recording formats: N-RAW, R3D NE, and ProRes RAW. Both N-RAW and ProRes RAW use either [N-Log] or [SDR] tone modes. R3D NE uses Log3G10/REDWideGamutRGB, the tonal gradation used with RED cinema cameras.

You'll notice differences in the overall look when comparing R3D NE footage with standard LUTs* applied to N-RAW with N-Log gamma, but another significant change is the ISO sensitivity setting.

*N-Log: N-Log_BT2020_to_REC709_BT1886_size_33
R3D NE: RWG_Log3G10 to REC709_BT1886 with MEDIUM_CONTRAST and R_2_Medium size_33 v1.13
The dual base ISO feature is enabled in the R3D NE recording format, requiring a two-step process for ISO sensitivity settings: first selecting either [Low sensitivity] or [High sensitivity] base ISO sensitivity mode, then setting the specific ISO value.
The [Low sensitivity] base ISO sensitivity is ISO 800, while [High sensitivity] corresponds to ISO 6400, and the ISO sensitivity values can be adjusted within a range of two stops above or below the base ISO value for each setting.

Generally with cinema cameras, using a lower ISO sensitivity than the base ISO sensitivity produces more tonal gradation in the shadows, while using a higher ISO sensitivity produces more tonal gradation in the highlights.

For example, when setting the ISO sensitivity to 1600 in a low-light environment, selecting [High sensitivity] as the base ISO sensitivity and lowering the value produces more tonal gradation in the shadows and clearer footage with less noise compared to selecting [Low sensitivity] and raising the value.

This technique of intentionally setting ISO sensitivity is also essential for controlling the texture of an image.
Next, let's look at how to set a 3D LUT. When recording R3D NE videos, you can convert the Log image to standard contrast by setting Custom Setting [g15: LUT view assist] to ON.

It can also be applied by setting [View assist] to ON in the assist display.
Use an external display that supports LUT to apply this LUT to external output images, as the LUT's effect does not apply to videos output via the HDMI connector.
To reproduce the same look as the ZR's built-in LUT, download the LUT from the official RED website and apply it to your external display.
*Account registration required

Select a file with "MEDIUM_CONTRAST" and "R_2_Medium" in its file name to match with the ZR's built-in LUT, select a file with "MEDIUM_CONTRAST" and "R_3_Soft" in its file name for RED's standard tonality.

When using the wave-form monitor with R3D NE recording, check the exposure using the warning lines displayed, as the highlight clipping level changes.

Finally, let's take a look at some useful accessories that extend the ZR's functionality.
We recommend Arca-type dovetails, as they allow for quick switching between vertical and horizontal positions.

BASIC:
| Nikon | NIKKOR Z 24-70mm f/2.8 S II |
| Nikon | Shotgun Microphone ME-D10 |
| SmallRig | 5466 L-Shaped Silicone Handle for the Nikon ZR |
| NiSi | JetMag Pro VND Flex Kit |
| Integrated Arca-type dovetails | |
Attaching an external battery allows longer shooting sessions, such as for documentary filming.

Advanced:
| Leitz Cine | HEKTOR |
| Sennheiser | Shotgun Microphone MKE 400-II |
| NiSi | JetMag Pro VND Flex Kit |
| SmallRig | Basic Camera Cage Kit for Nikon ZR 5467 |
| SmallRig | Ultra-Slim Female HDMI Type A to Male Micro-HDMI Type D Adapter Cable 3021 |
| SmallRig | V-Mount Battery Mount Plate Kit 5227 |
| Atomos | SHINOBI II |
| IDX | Imicro-50P V-Mount Battery |
Using a dedicated XLR adapter provides XLR audio input. We recommend using a height-adjustable baseplate when attaching a matte box on rods.
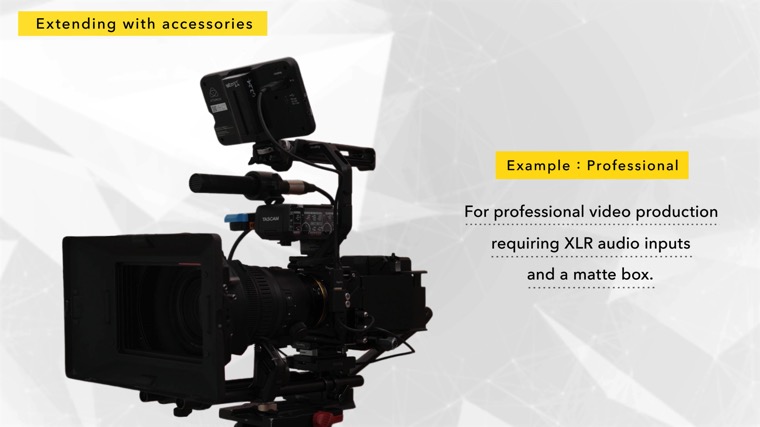
Professional:
| Nikon | NIKKOR Z 28-135mm f/4 PZ |
| Nikon | MC-N10 Remote Grip |
| TASCAM | TM-200SG Shotgun Microphone for Field Recording |
| TASCAM | CA-XLR2d-N XLR Microphone Adapter |
| Sennheiser | AVX-ME2 SET-5-US Wireless Omni Lavalier Microphone System |
| SmallRig | Basic Camera Cage Kit for Nikon ZR 5467 |
| SmallRig | Ultra-Slim Female HDMI Type A to Male Micro-HDMI Type D Adapter Cable 3021 |
| SmallRig | V-Mount Battery Mount Plate Kit 5227 |
| SmallRig | Bolt-On Mount with ARRI-Style Rosette SAP2804 |
| SmallRig | Top Handle for the TASCAM CA-XLR2d-N 5533 |
| SmallRig | Universal 15mm Rail Support System Baseplate 2092B |
| SmallRig | 15mm Rod Pack 20 cm/30 cm 1659 |
| Tilta | Tilta Mini PD V Mount Battery Plate |
| Tilta | Mirage Pro Matte Box |
| Tilta | Nucleus Nano II Wireless Lens Control System |
| Atomos | NINJA TX |
| IDX | Imicro-50P V-Mount Micro Type Lithium-Ion Battery |
*The accessories listed above are provided for reference only and their operation is not guaranteed.
Please note that some items may not be available for purchase, or may have been discontinued, depending on the country or region.
While the ZR is designed as an ALL-IN-ONE camera that can shoot without accessories, you can experiment and find an optimal setup that suits your shooting style.
The ZR is a compact cinema camera equipped with features that support professional filmmaking, including RED CODE RAW (R3D NE), in body image stabilization (VR), and high speed, high precision autofocus. By understanding the basic settings, you can create the intended look just as you envision it, and by combining various accessories, you can handle a wide range of shooting situations up to full cinema productions. We hope you will make full use of it as a tool to further enrich your filmmaking experience.