Video Shooting
Video Shooting #3: Using Autofocus
Supervision and sample footage by Koji Ueda (Photographer/Videographer)
Videographers typically use manual focusing. But, with the mirrorless camera's powerful autofocus, you can trust the camera to achieve precise focus operation, including focus speed adjustment, freeing you up to get more creative.
In this article, we'll introduce basic video AF settings, example situations, and convenient features that help videographers when using autofocus.
Index:
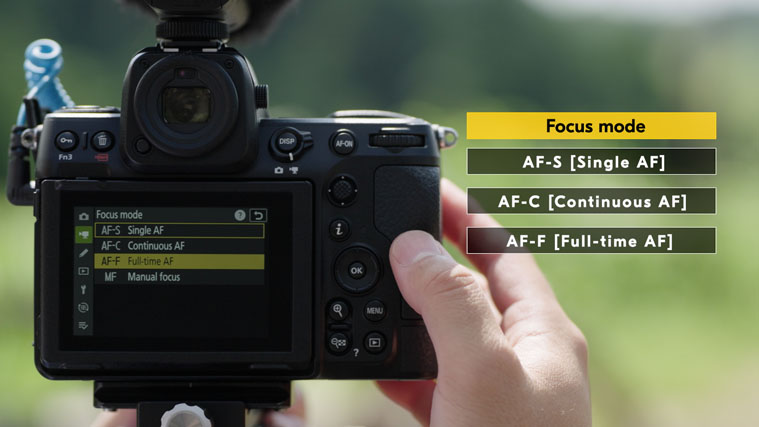
First, let's look at focus mode settings. When shooting video, you can select the focus mode from AF-S, AF-C, or AF-F.
You can initiate the autofocus by pressing the shutter-release button halfway, pressing the AF-ON button, or by touching the monitor. [Touch AF] can be enabled via [Touch shooting setting].
With AF-S, you can focus on the subject, and this then locks the focus position. This is a useful feature when shooting still subjects such as landscapes.
AF-C is a mode where the camera continues focusing on the subject only when the autofocus is being initiated. This is great when you want to have control over the timing to focus, such as when racking.
AF-F is a mode that adjusts the focus continuously in response to subject movement or changes in composition. Combined with subject detection, it automatically tracks moving subjects and keeps them in focus wherever they or you move. This mode is recommended for a lot of situations, but especially when shooting on a gimbal.
There are seven AF-area modes to choose from.
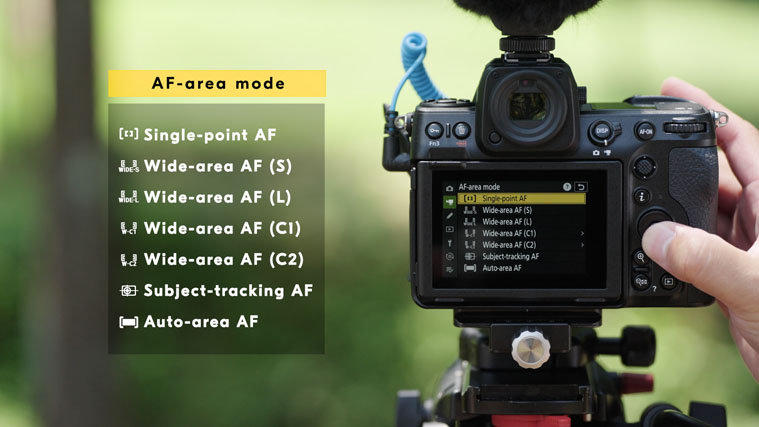
You can use subject detection in six of the seven AF-area modes: Wide-area AF (S), Wide-area AF (L), Wide-area AF (C1), Wide-area AF (C2), Subject-tracking AF, and Auto-area AF.
In the subject detection menu, you have the option to choose from Auto, People, Animal, Birds, Vehicle, Airplanes, or subject detection off.
When you select auto, the camera will automatically detect any people, animals, or vehicles in the frame and focus on them. If you know what you are shooting, you can increase the accuracy of the autofocus by selecting a specific subject.
Effective use of the AF allows you to easily incorporate focus expressions as a visual effect. By combining multiple AF settings, you can get the look you intend in your video.
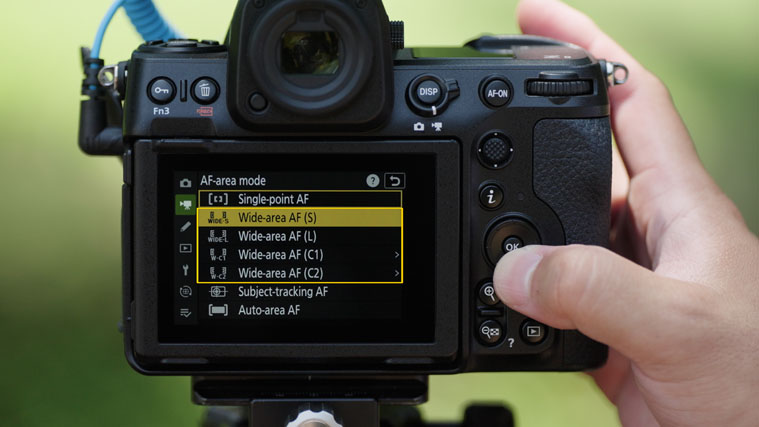
AF-C focus mode is a good setting when you want to rack focus from a foreground subject to the background, or vice versa, when multiple subjects are in frame. Select a suitable AF-area mode according to the subject size to limit the area in which you want to focus.
Wide-area AF (S), Wide-area AF (L), Wide-area AF (C1), or Wide-area AF (C2) are recommended for this. Otherwise, you can move the focus point using the sub-selector and press the AF-ON button when you want to rack focus.
You can change the speed of the focus in the custom settings menu, under [g6: AF speed]. You can use quicker AF speeds for rapid focus shifts. You can use slower speeds for gradual focus changes. You can choose the speed that best suits your video's style.
You can also adjust how quickly the focus shifts when the original subject moves out of the frame or other subjects enter the frame while recording. Go to custom settings menu [g7: AF tracking sensitivity]. If you select low, you can maintain the focus on your original subject for longer. If you select high, the focus will quickly shift to new subjects that come into the frame.
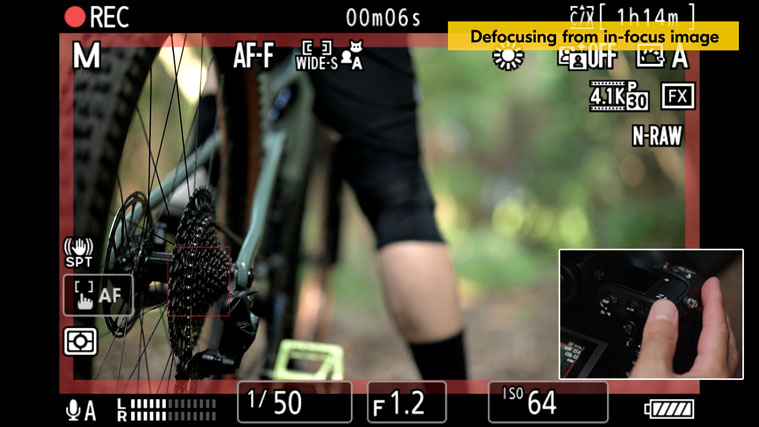
Next, we will introduce how to get an interesting shot where you pull focus to the subject from an entirely out-of-focus image, and vice versa.
Set AF-F for focus mode. Go to custom settings menu [g2: Custom controls] and assign [AF lock only] to one of the custom control buttons. Hold down the assigned button to lock the focus.
To pull the focus to a subject, press the assigned button for AF lock only when the frame is out of focus. Then, take your finger off the button when you want to rack focus. The frame will gradually shift to being in focus.
For the reverse effect, while still in AF-F mode, simply press the assigned button for AF lock only, and the subject will gradually become out-of-focus as your subject moves away from your camera.
By mastering autofocus, it's also easy to create impressive transitions using foreground bokeh.When a subject is not detected in AF-F in the default setting, the camera tends to automatically focus on a high-contrast subject in the foreground in a frame. In such situations, go to [AF subject detection options] in the video menu, choose [AF when subject not detected], and select [OFF]. This disables autofocus when subjects like people are not detected. This is great for creating impressive transitions, using a foreground obstacle such as a tree or wall as foreground bokeh, and revealing a person in the background while, for example, moving the camera on a slider.
Lastly, we will introduce convenient features that help videographers when shooting video with autofocus.
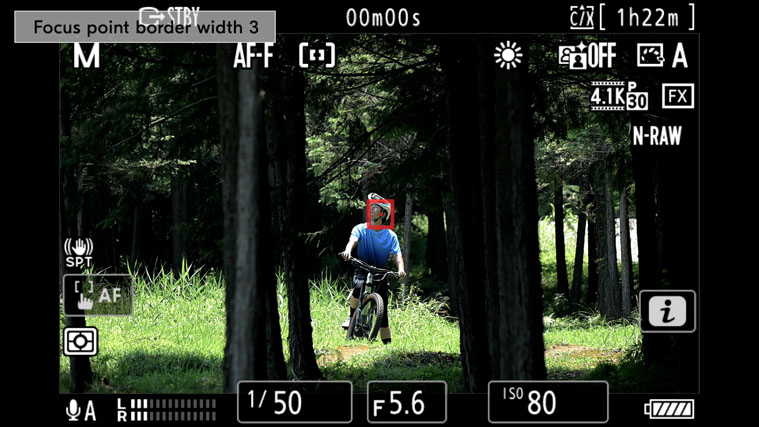
The focus point border can be adjusted in three different widths via custom settings menu [a11 Focus point display], [Focus point border width] setting. This helps to make the focus point more visible when you have, for example, a scene with a busy background.
You can also magnify the screen by 50%, 100%, or 200% to see what you are shooting up-close while recording. This lets you check the focus more easily, even when shooting in high resolutions like 8K UHD, when you need extra care that you have a sharp image.
With the mirrorless camera and its powerful and versatile autofocus, you can get the look and feel of your focus and keep your subjects tack-sharp with ease.