Video Shooting
Video Shooting #1: The Basics
Supervision and sample footage by Takayuki Yagishita (Videographer)
The demand for short-form videos, primarily for social media, is rapidly growing. Even photographers who mainly focus on stills are increasingly required to have video shooting skills.
In this article, we've invited Mr. Yagishita, a professional videographer adept at both stills and video, to explain the fundamental knowledge that photographers need to start shooting video using the Nikon Z8.
Index:
The first two concepts you will need to know about are resolution and frame rate.
With the Z8, you can choose from six resolution options.
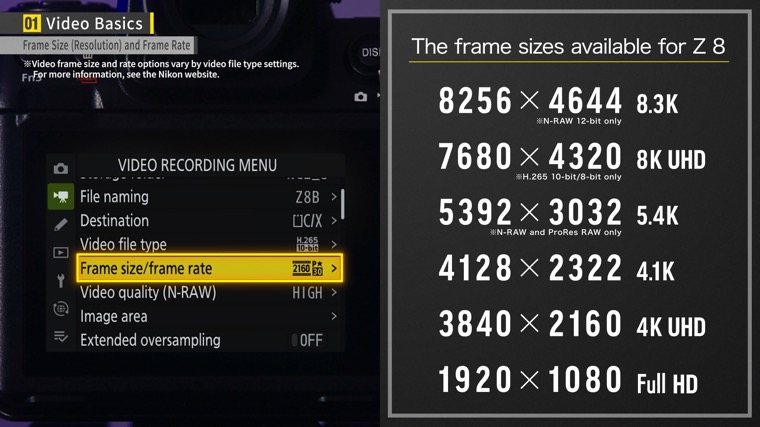
The higher the number, the higher the resolution. And the higher the resolution, the larger the file size.
Personally, I often shoot at a slightly higher resolution than that of the final format. For example, if my video will be in Full HD, I shoot it in 4K. This allows me to zoom in on the video or apply digital zoom when editing
In addition to resolutions, you will need to understand frame rates.
A video consists of a series of still images. The frame rate refers to the number of images displayed in a span of one second. The higher the frame rate, the smoother the video. You can select a suitable frame rate according to the atmosphere you want to produce and the purpose of the video. A frame rate of 30p (30 fps) is often used for television and YouTube. 24p (24 fps) is often used for cinema, whereas 60p (60 fps) is used for videos that feature fast motion and computer graphics.
It is important to note that there are two types of frame rates: the shooting frame rate and the playback frame rate. The shooting frame rate is configured on the camera, and the playback frame rate is configured in the editing software.
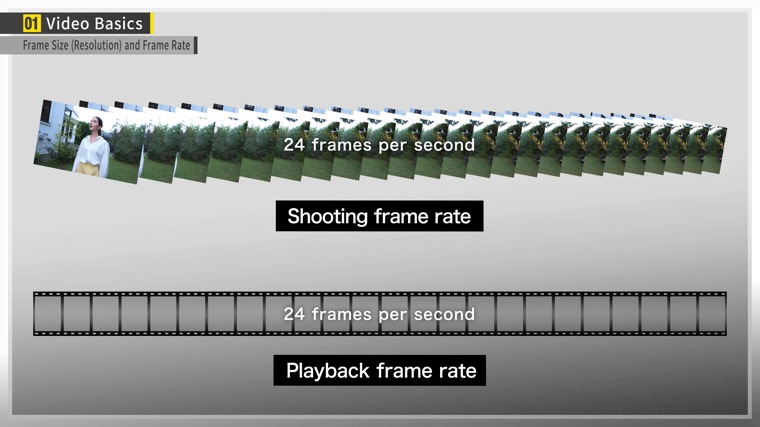
The final frame rate of the video is the value configured for playback frame rate. Generally, the two frame rates should be configured to the same value.
However, it is also possible to create dramatic slow-motion videos by selecting different frame rates for playback and shooting, and then adjusting the playback speed in the editing process.
One of the major differences between shooting still images and videos is the shutter speed.
When shooting still images, the shutter speed is determined by the movement of the subject, and the image to be expressed. However, in video recording, the shutter speed must be determined according to the configured frame rate. The reason is that “motion blur” is important in videos. “Motion blur” is the equivalent of “subject blur” in still photography. Normally, when shooting a moving subject in a still image, the shutter speed must be increased to prevent subject blur.
When recording a video, however, increasing the shutter speed too much may end up with the image looking like a flip book. For videos, it is better to have a moderate amount of motion blur. This will make the video appear more natural. A rule of thumb for achieving a moderate amount of motion blur is to set the shutter speed to twice the frame rate.
For example, if the frame rate is set to 30p, the shutter speed should be 1/60 s, and if it is set to 24p, the shutter speed should be 1/50 s.
* If there is a noticeable flicker, it can be reduced by selecting the following shutter speeds according to the frequency of the local power supply:
If the frequency is 50 Hz, choose 1/100 s or 1/50 s.
If the frequency is 60 Hz, choose 1/125 s or 1/60 s.
Another major difference between shooting still images and videos is exposure.
It is crucial in video recording to determine the appropriate shutter speed for the frame rate. Based on your filming intentions, you set the aperture and adjust exposure using ISO sensitivity.
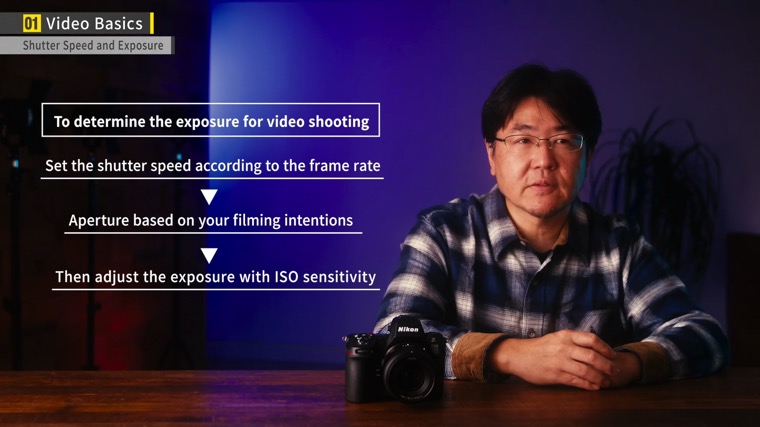
If you want to adjust the exposure in a bright environment, such as outdoors on a sunny day, you can use an ND filter. Variable ND filters that can adjust the level of dimming are also often used in video recording.
On the Z8, you can select the format in which to record videos from six options.
N-RAW and ProRes RAW are recording formats intended for RAW processing and editing. N-RAW is Nikon's proprietary format that allows efficient, in-camera recording of 8K60p videos. ProRes RAW is a RAW format developed by Apple Inc. ProRes 422 HQ is a high-quality video format suitable for TV broadcasts. Though not as large as RAW files, it should be noted that these files will take up a lot of space.
H.265 is a format that features efficient compression, allowing you to record high-quality video that does not occupy a lot of space. You can choose between 10-bit and 8-bit color depth. If you want to adjust the color thoroughly in editing, 10-bit is recommended.
H.264 is a versatile format that is easy to edit, even on less-powerful computers.
Many newer cameras allow you to configure the tone mode for video. On the Z8, you can choose from HLG and N-Log in addition to the regular SDR for a total of three types.
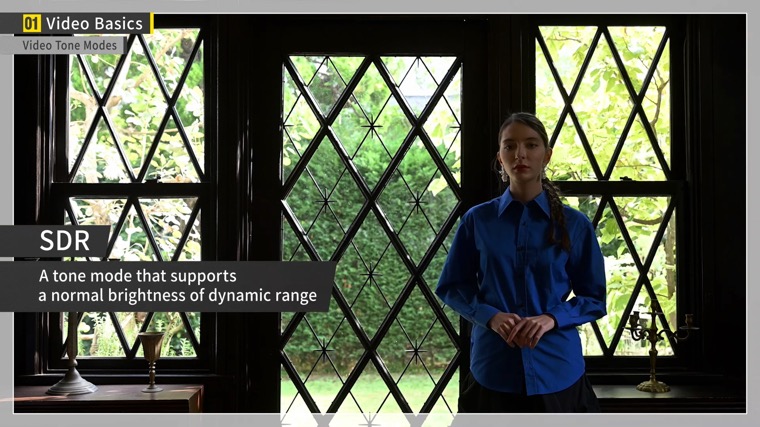
SDR is a standard tone mode that supports a normal brightness of dynamic range. HLG is a tone mode compatible with the dynamic contrast of HDR.
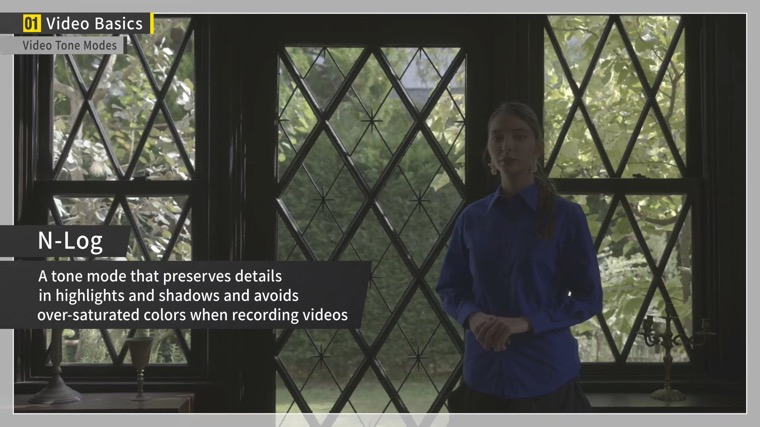
N-Log is a tone mode designed for color grading that preserves details in highlights and shadows and avoids over-saturated colors when recording videos.
Next, I will introduce you to some settings that you should pay attention to.
The first is white balance. Although Auto is useful for still shooting, I recommend that you use manual settings with a fixed Kelvin value or a preset for videos.
If you aren't shooting in N-log or RAW format, you can apply Picture Controls. I recommend “Flat” for shooting videos.
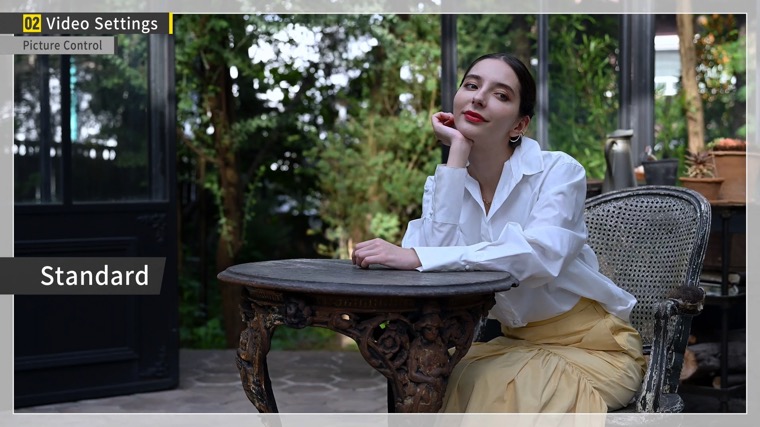
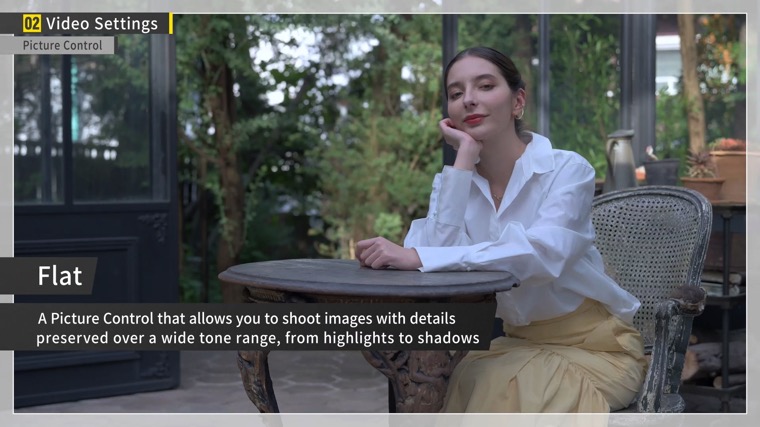
I don’t often use this Picture Control for still shooting, but it allows you to create videos with a sense of unity and good transitions between cuts just with a few steps of fine-tuning the color and contrast.
If you want to make a short video without any editing, another option is to use Creative Picture Controls. For example, selecting “Toy” and setting the effect level to 50%, slightly lowering the level, will allow you to produce a cinematic effect with ease.
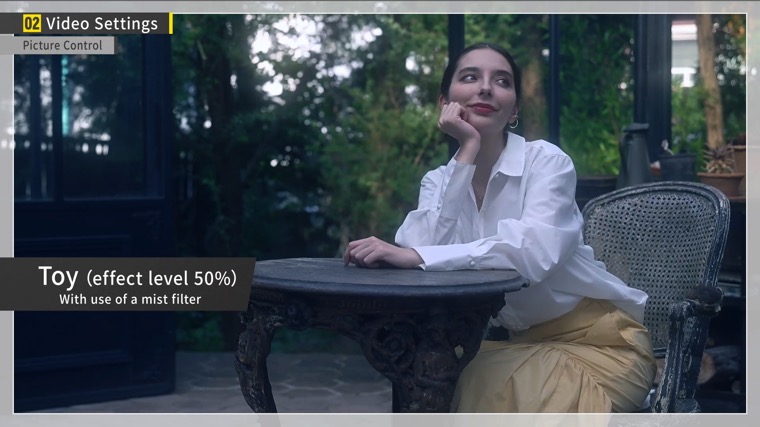
In addition, using a mist filter, for example, a black mist filter will result in a more atmospheric video.
Professional videographers often use manual focus, but if you are just getting into video recording, I recommend using the AF-C autofocus setting.
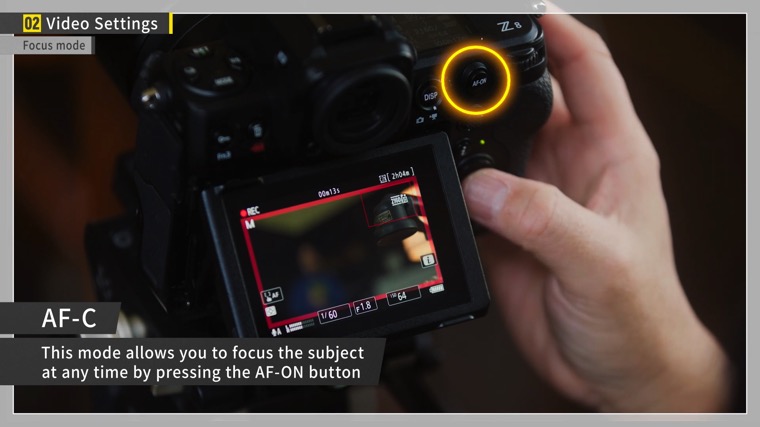
Using AF-C allows you to focus at any time by simply pressing the AF-ON button. Furthermore, if you continue to hold the AF-ON button, the camera will continue to focus.
As for the AF-area mode, I recommend choosing an option that suits the subject. If you want to produce a foreground blur, Wide-area AF is effective.
When shooting handheld, I recommend “Sport” mode to stabilize the display.
Finally, I will show you some lenses that are convenient for shooting videos, as well as settings that I recommend.
For video shooting, I recommend a lens with a high zoom ratio, such as the NIKKOR Z 24-120mm f/4 S. This convenient lens can handle various angles of view and produce a consistent look for your shots.
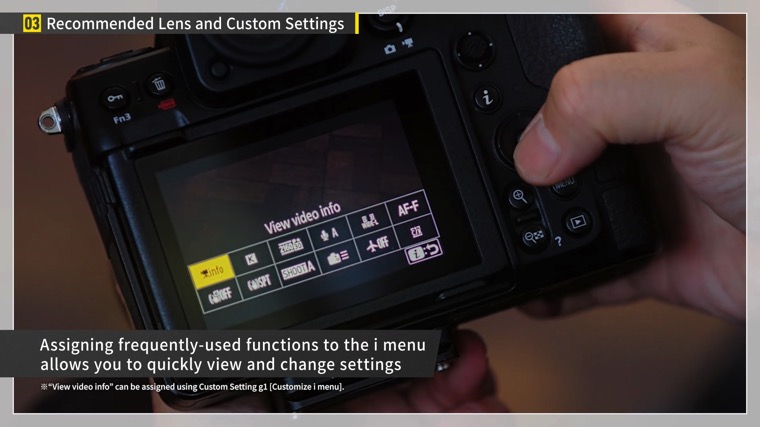
I also recommend customizing the i menu to settings that you often use. I configured my camera so that I can use the i menu to recall the “View video info” item. This allows me to quickly check the shooting settings. You can configure your i menu according to your purposes and preferences.
In another article, I will introduce some key points to keep in mind when shooting. I hope you check it out!