SB-5000
Radio AWL 2: Establishing a Wireless Connection
Here’s what you’ll need to do to ready the camera and flash unit for radio-controlled
Advanced Wireless Lighting, otherwise known as “radio AWL”.
Step
1: Ready the Equipment
You’ll need:
- A D500
or other camera that supports radio AWL
- An SB‑5000 flash unit
- A WR‑R10 and WR‑A10
Step 2: Connect the Wireless Controller
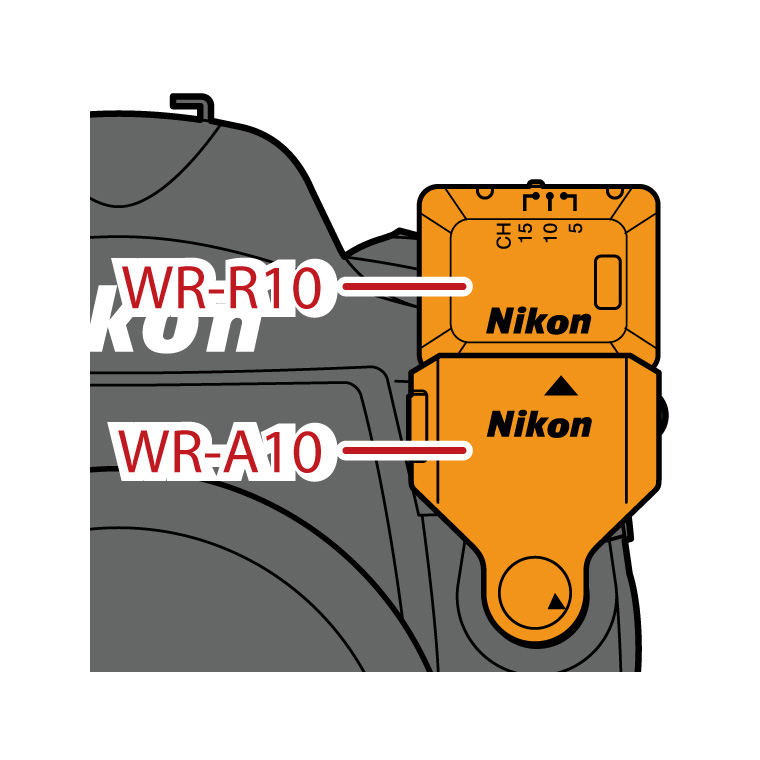
Connect the WR-A10 WR adapter and WR‑R10 wireless remote controller to the camera.
Step 3: Adjust Settings for Connection to the Camera
Adjust settings as follows:
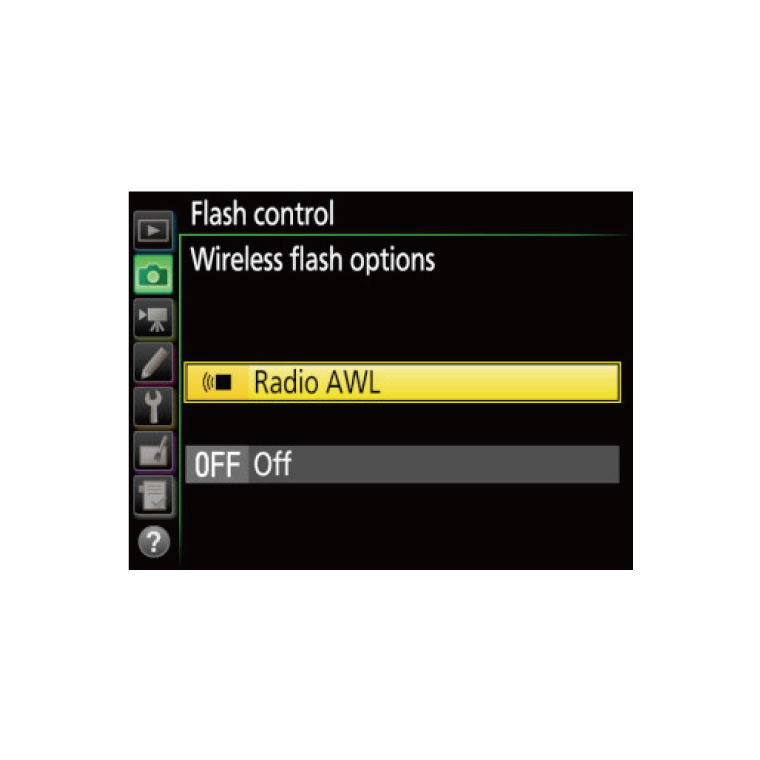
- Select a wireless flash control mode: Select Radio AWL for Flash control
> Wireless flash options
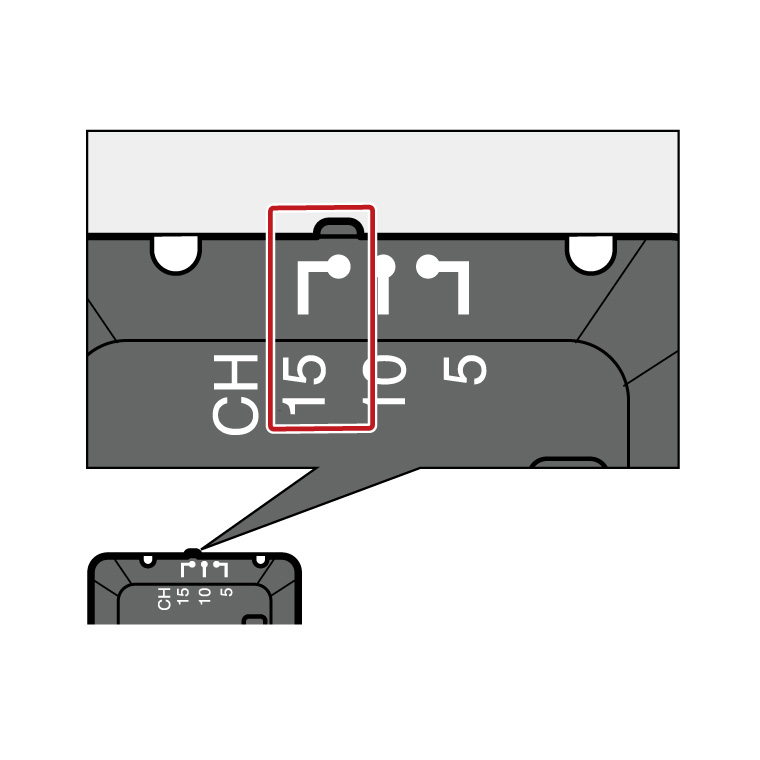
- Choose a channel: Set the WR‑R10
to the desired channel
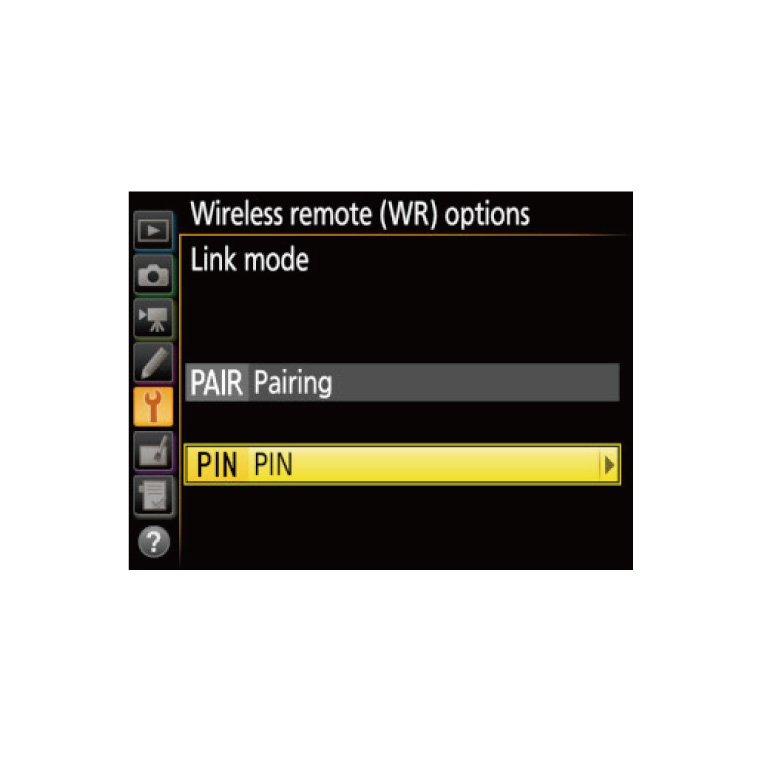
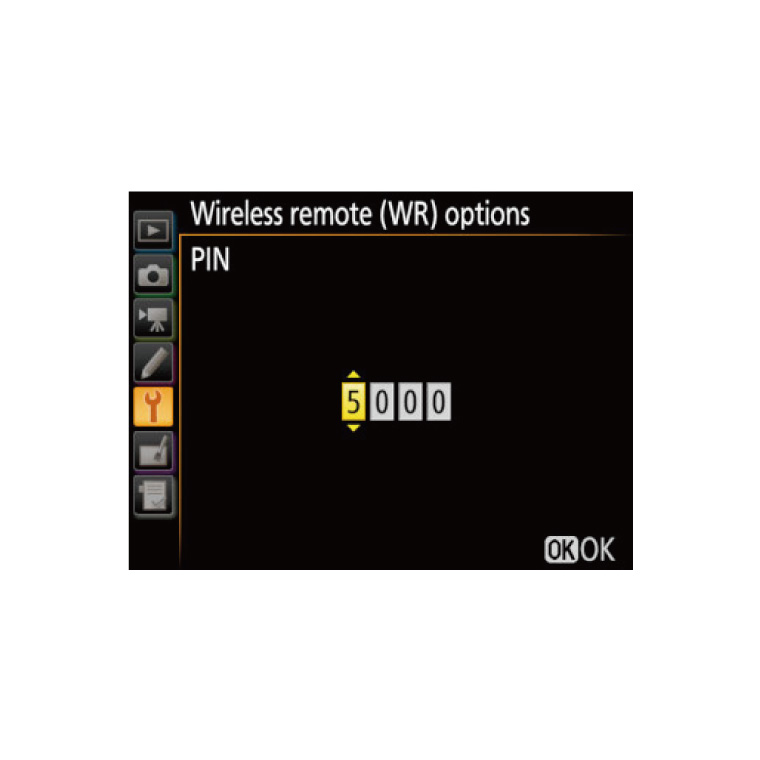
- Choose a link mode: Select PIN and enter the camera PIN
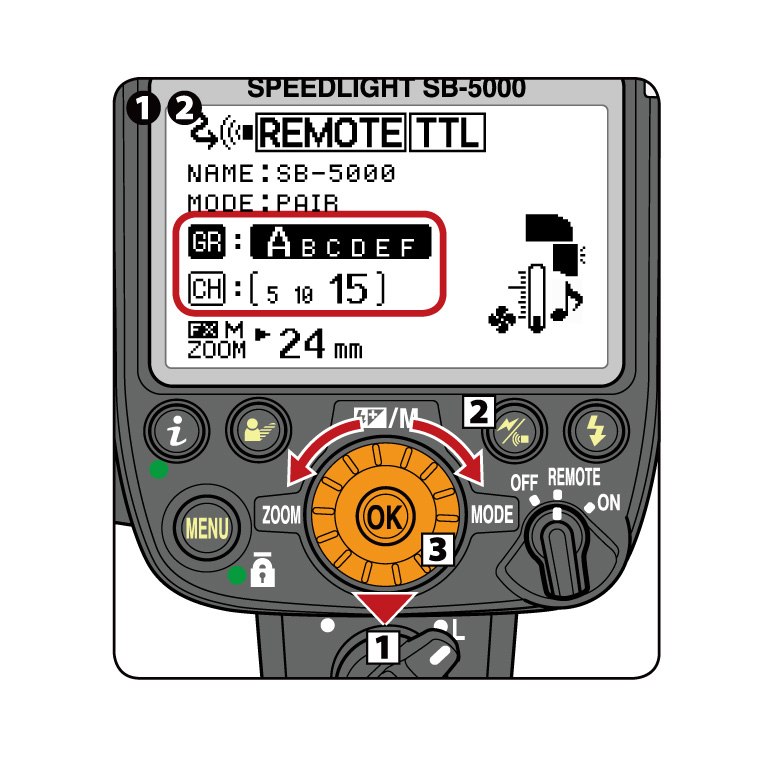
Step 4: Adjust Flash Unit Settings
Adjust flash
unit settings as follows:
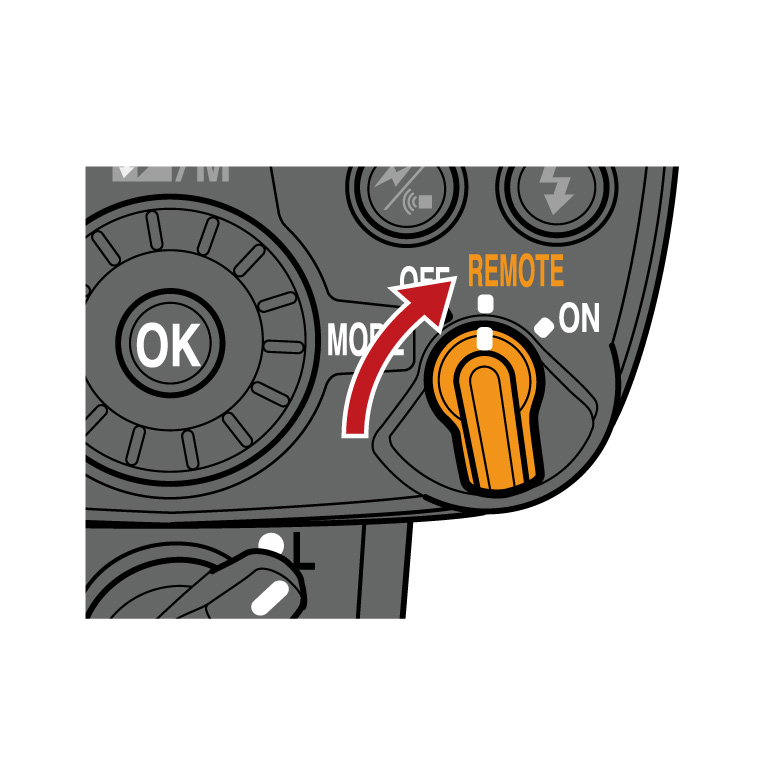
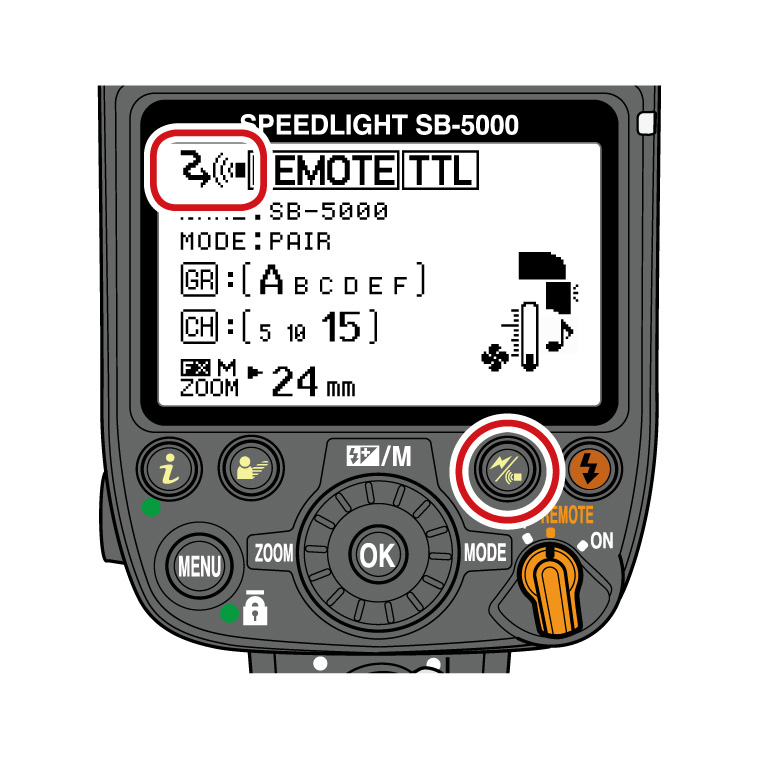
- Select a wireless flash control mode: Rotate the power switch to
REMOTE.
- Select a remote mode: Choose “radio
control remote” mode
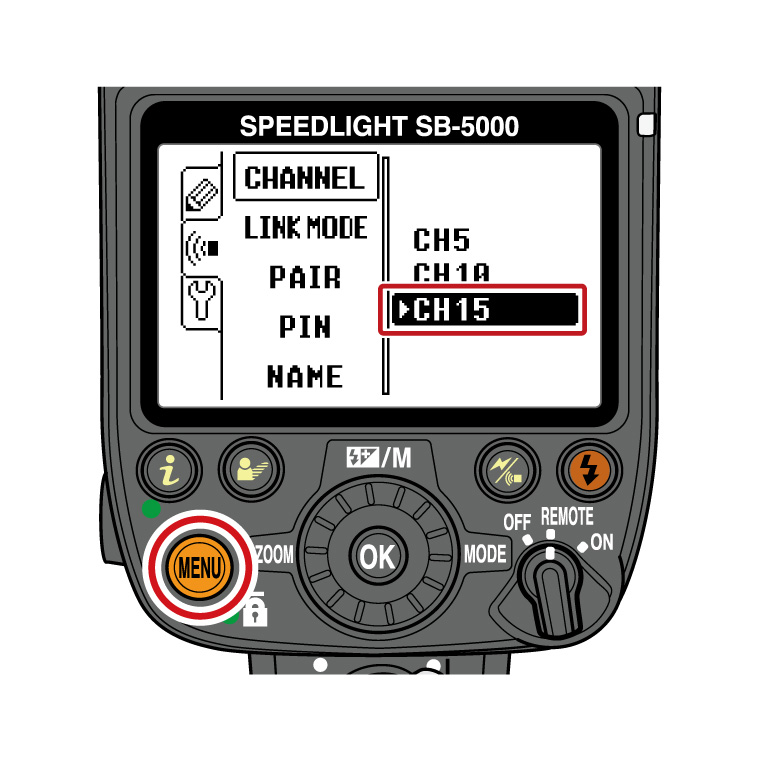
- Choose a channel: Choose the channel selected with the WR‑R10
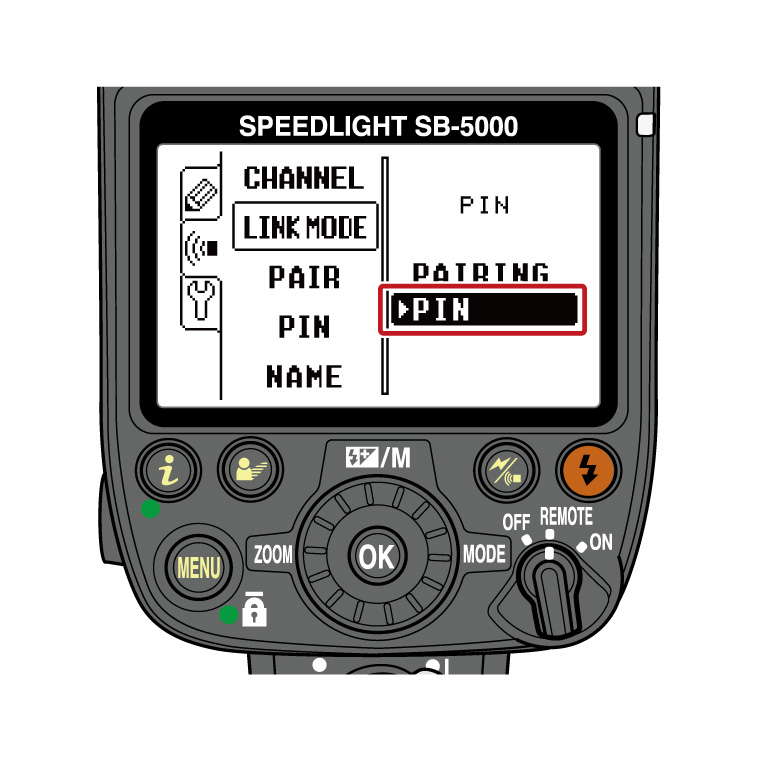
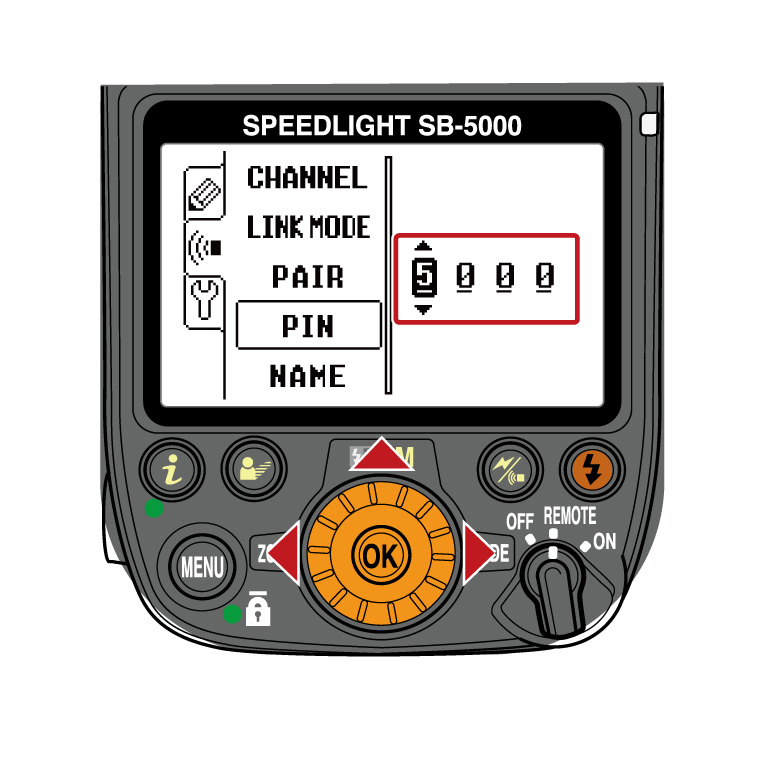
- Choose a link mode: Select PIN and enter the camera
PIN
Step 5: Choose a Group
Step
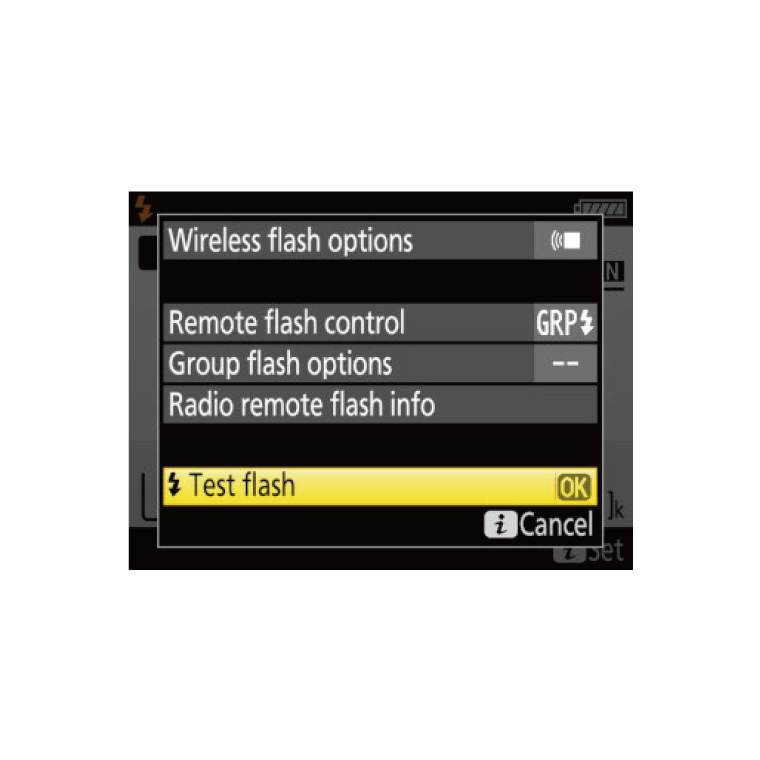
6: Check Flash Status
Step 7: Test-Fire the Flash