D7500
Train Photos (Basic Camera Settings)
Although there is no universally agreed-upon definition of what constitutes “train
photos”, they commonly include both trainset photos that capture trains in motion
and landscape shots of trackside scenery that capture the changing seasons. This category
may also be said to include “train roster” photos cataloging locomotives
and rolling stock, silhouettes, panning shots, and artistic shots featuring skillful
use of light, not to mention travel photos that, although not of trains per se, feature
stations and railcar interiors.
Trainset
Photos: The Basics
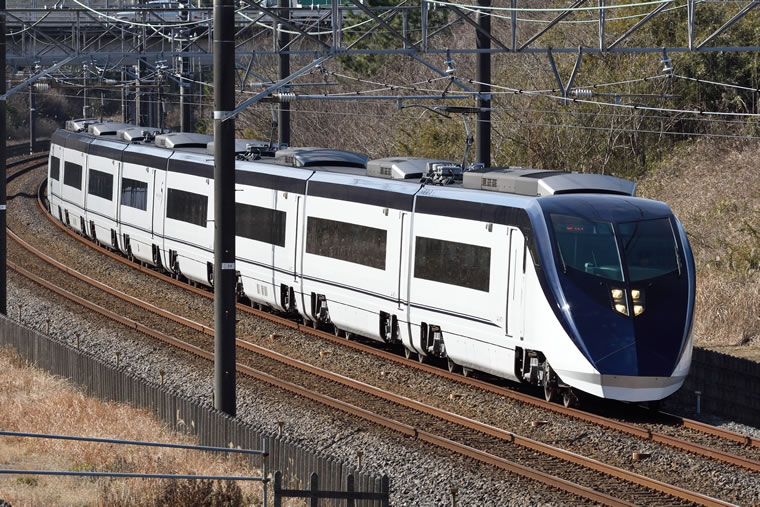
The key to a good trainset photo is
to keep it all in the frame while capturing its identifying features. When choosing
a time and location, use a map, check the angle of the sun, and choose a relatively
unobstructed location and a time at which the train will be front-lit. And don’t
forget to consult the time-table too, as the timing will be affected by when the train
runs.
You will also need to think about the background. Shots uncluttered
by man-made objects (such as buildings, transmission towers, and utility poles and
overhead wires that are not part of the railway) are considered desirable unless such
details are important to the composition.

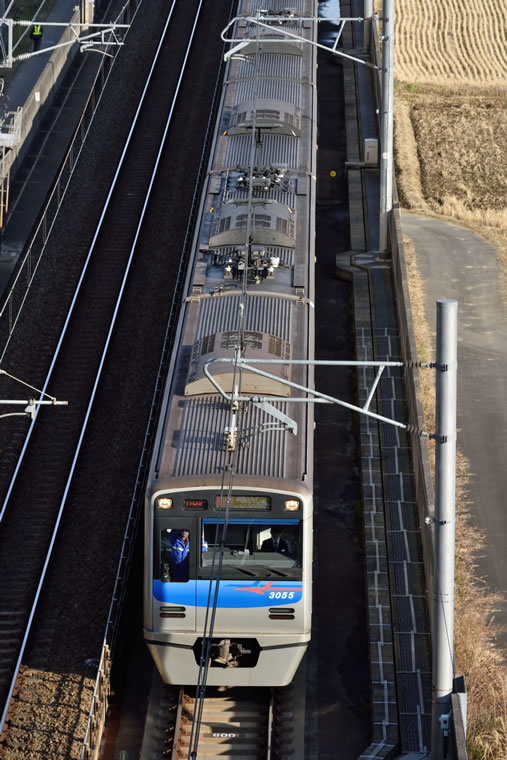
Tight framing is important for trainset photos, so we recommend you use a tripod.
Given that you can largely predict the movement of your subject from the placement
of the rails, you can focus before settling in to wait for your subject, a “focus
and forget” technique that lets you to concentrate on timing. “Focus and
forget” generally involves manual focus, but you can also try autofocus or use
focus zoom to check focus in live view.
If you intend to use autofocus,
there are three custom settings you’ll need to adjust before you shoot:
1. Select AF-ON for Custom Setting f4 (Assign
AE-L/AF-L button). This assigns focus to the AE-L/AF-L button.
2. To prevent the camera focusing when the shutter-release button is pressed, select
Off for Custom Setting a4 (AF activation).
3. For pin-point accuracy when using “focus and forget”, choose
an AF-area mode of single-point or nine-point dynamic-area AF.
After framing
the shot, choose a focus area in the vicinity of the rails where the lead car will
come and press the AE-L/AF-L button to focus.
Set the release mode to
CH (continuous high speed). This can be a very effective
against such surprises as a utility pole unexpectedly blocking the front of the lead
car or unsightly poles and power lines being reflected in a car window.
Be
sure also to set both Custom Setting a1 (AF-C priority selection)
and Custom Setting a2 (AF-S priority selection)
to Release. Choosing release priority ensures that you won’t
lose shots due to the camera failing to release the shutter. For the actual photograph,
you’ll want to press the shutter-release button as the lead car passes your
pre-selected focus point and keep it pressed for two or three shots.
Next:
exposure. To freeze the motion of the passing train, choose mode S (shutter-priority
auto). The shutter speed will vary with the speed of the train and your choice of
lens, but it should be in the ballpark of 1/1500 s or slower at an aperture of at
least f/8. Consequently ISO sensitivity should be set to a value of around ISO 400
on sunny days or ISO 800 on cloudy ones.
Choose auto white balance or
a setting that matches the lighting conditions and select the “Standard”
Picture Control. Shooting at an NEF (RAW) image quality setting ensures colors can
later be fine-tuned to match those of the actual train using NEF (RAW) processing.
Lenses with a focal length of from 50 to 200 mm (35 to 130 mm in DX format) are a
good choice for trainset photos.
The
Joy of Train Photos
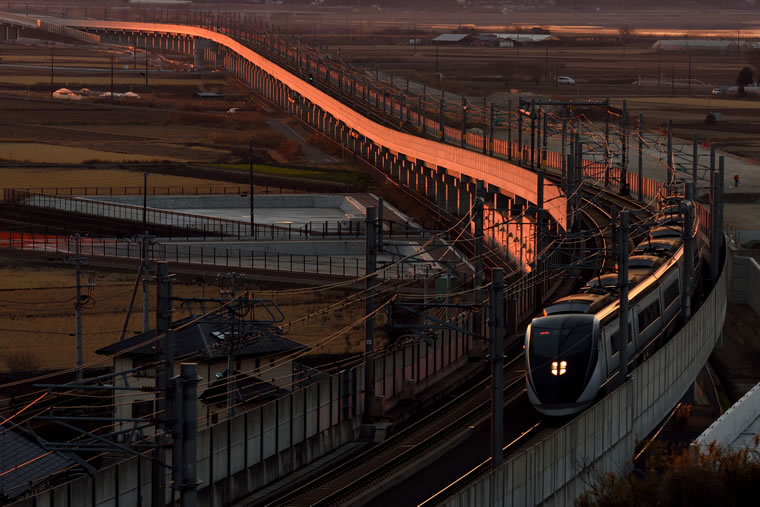
Trains from different regions come in all shapes and sizes, from high-speed rail and
steam locomotives through to local and commuter trains. More and more lines offer
more than just a means of getting from Point A to Point B, with cars in a rich variety
of shapes and colors and interiors that vary from observation to dining and snack
cars and everything in between.
In Japan trains traverse landscapes that
change with the seasons, enhancing the romance for photographers who enjoy working
out angles to perfectly capture different scenes.
The peculiar joy of
train photos may also no doubt be found in capturing the power of high-speed trains
or the energy of steam locomotives, or in perfectly timing a shot of train that comes
only once a day or is on its last trip before retirement.