Setup from the Camera Menus
The camera clock can be set manually.
Procedure
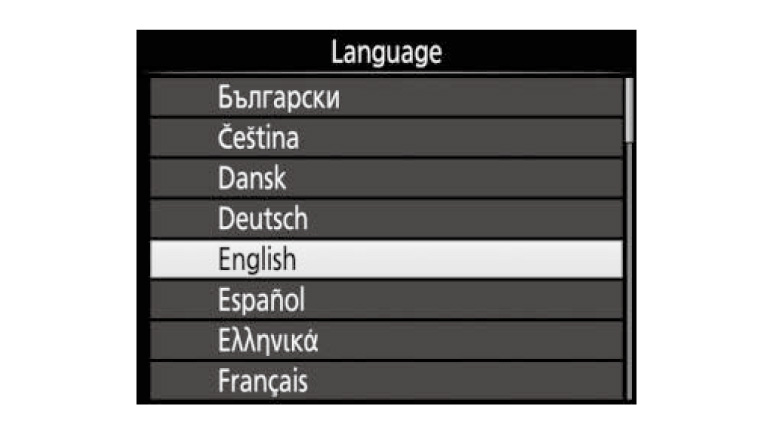
01. Turn the camera on.
A language-selection dialog will be displayed.
A language-selection dialog will be displayed.
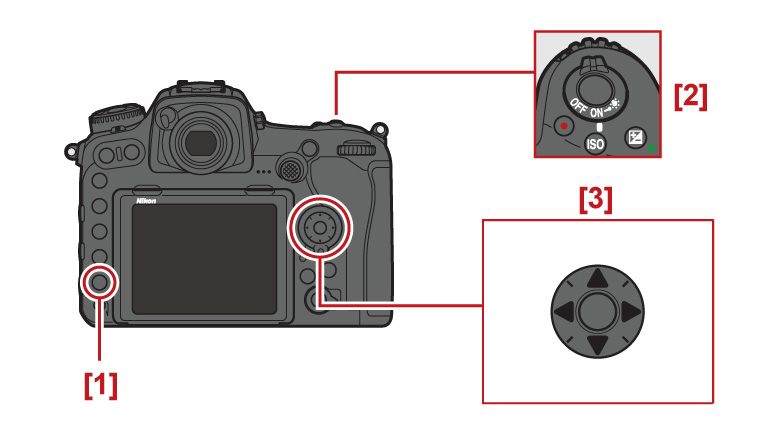
Use the multi selector and  button to navigate the menus.
1: button (select)
2: Power switch
3: Multi selector
press and
and  to highlight a language and press
  to select. The language can be changed at any time
using the Language option in the setup menu.
1:
2: Power switch
3: Multi selector
press
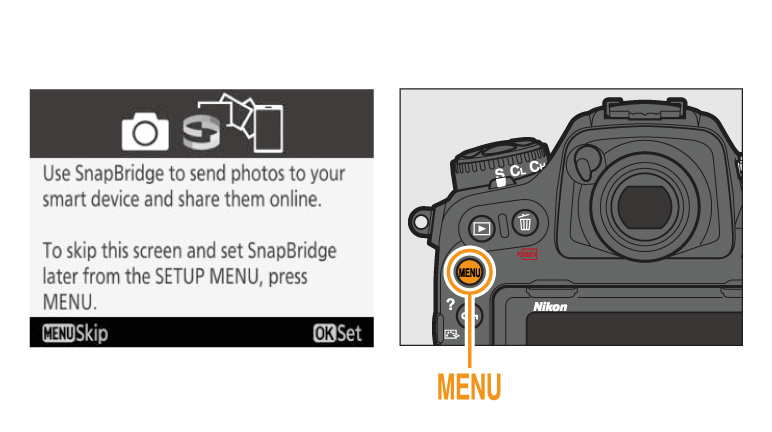
02. Press MENU when the dialog at right is displayed.
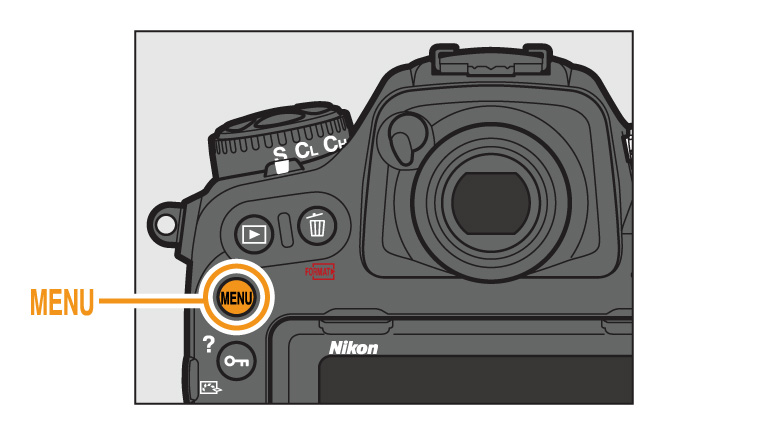
03. Set the camera clock.
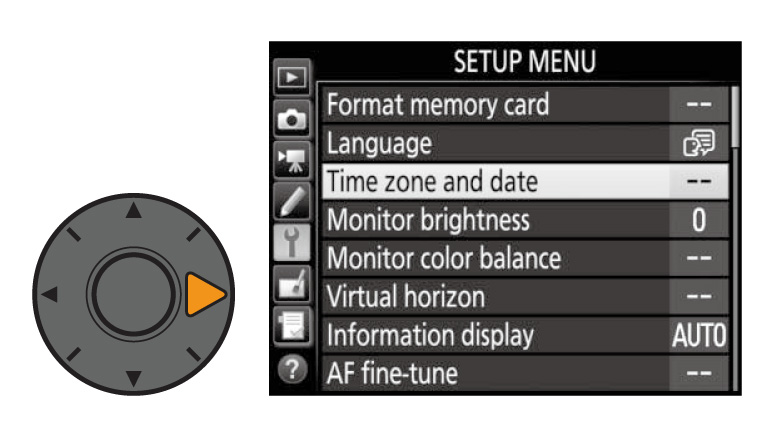
Press the MENU button to display the setup menu.
Highlight Time zone and date and press (the setup menu is automatically displayed with Time zone and date
highlighted the first time the menus are displayed).
Press the MENU button to display the setup menu.
Highlight Time zone and date and press
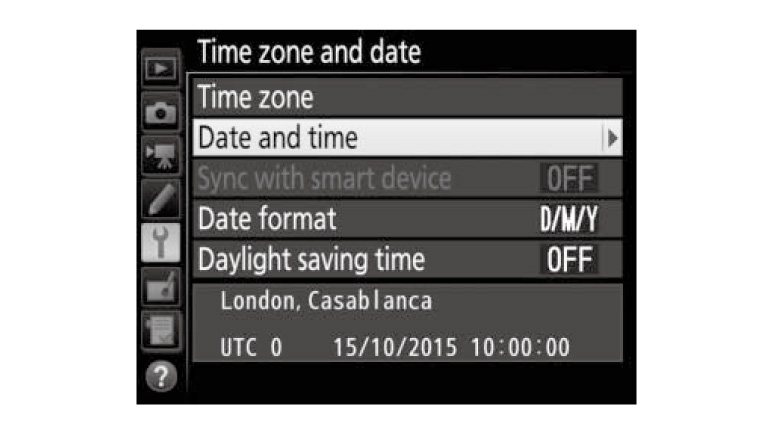
After using Time zone to choose a time zone and (if applicable) Daylight
saving time to enable daylight saving time, highlight Date and time
and press  .
.
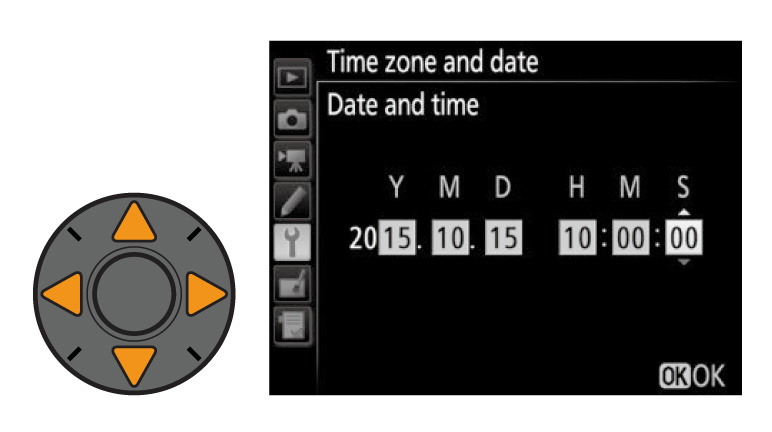
Press  or
or  to highlight items and press
  or
or  to change, then press
  to set the clock when adjustments are complete. The
clock can be adjusted at any time using the Time zone and date >
Date and time option in the setup menu.
More D500 Tips and Tricks

